Glasshouse Interconnect Cable No.1
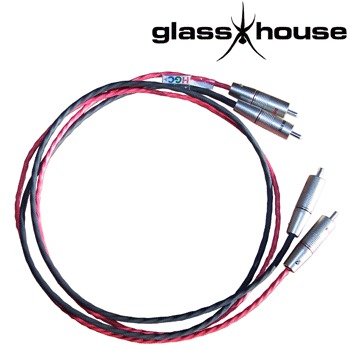
You are probably aware of the excessive prices manufacturers charge for high end interconnect cables, fuelled by the creation of new "trademarked" materials weaved in a "patented" way and made close to the earth`s core. Well, Glasshouse has come up with a no-nonsense interconnect cable kit called the Glasshouse Interconnect Cable No.1. Using hificollective`s best selling product, the HGC pure silver 0.5mm diameter solid core wire, but with a difference. We use 3 strands of the individually Teflon sheathed wire, twisted together and wrapped in heat-shrink, forming the HGC Litz wire, available in black and red heat-shrink. Married with the superb Audio Note silver RCA plugs (CON-310, CON-311), 2 strands are used for the earth and one for the signal, simple.
Being a kit you are saving money as you are only purchasing the composite components, the mark up of these is a fraction of the mark up of a manufactured cable, plus you have the enjoyment of making a relatively simple kit (1 hours work). So effectively you will be paying £132.87+vat+postage for a cable that is as good as a £300.00 off the shelf product. If you want us to make the cable up for you there is an extra £50.00 levy.
Listening Test:
The cable needs about 100 hours to run in, or if you have access to a toasting device a shorter time is required. The cable has excellent dynamics over the full frequency range, having a high content of pure silver the detailing is superb, you will be amazed how much new information this cable can glean from your recordings. Overall you will be delighted with the Glasshouse Interconnect Cable No. 1.
Instructions: please refer to pictures 2, 3 & 4
Price (1m pair, kit version)
£132.87 +vat+p&p
Price (1m pair, built version)
£182.87 +vat+p&p
- Carefully using a Stanley knife blade, cut back 40mm of the black heat shrink from one end.
- Unravel the 3 twisted wires.
- Take one wire (signal) and cut back the Teflon sleeving so as to expose 8mm of silver wire, bend the wire in half and tin with Audio Note solder.
- Take the remaining 2 wires (earth) and cut back 15mm from the soldered tip of the signal.
- Expose 7mm of silver wire on both strands, twist together and tin with Audio Note solder.
- Take one black RCA plug, familiarise yourself with how it is put together and separate all the parts.
- Thread the back portion onto the Litz wire (correct way round).
- Tin the earth connection part internally, near the split, carefully use a vice or pliers to hold still while soldering.
- Solder the 2 joined earth wires to the earth connection part.
- Thread the signal wire through the earth connection part and the signal post part and solder, try to keep the wire contained within the signal post part by the solder gap.
- Fit all the RCA plug parts together and tightened the grub screw, but not too tight so as to penetrate the wires, you have now completed one termination.
- Before you begin preparation of the other end you need to identify which of the three strands is the signal one. Using a multimeter set to DC resistance, hold one of the probes on the signal spigot of the finished RCA plug and with the other probe touch, in turn, the 3 strands until zero resistance is measured, this signifies the signal strand.
- Cut back the Teflon sleeving of this stand so as to expose 8mm of silver wire, bend the wire in half and tin with Audio Note solder. You can now easily identify the signal portion.
- Cut back 36mm of the black heat shrink from the end of the signal wire.
- Unravel the 3 twisted wires.
- Take the remaining 2 unsoldered wires (earth) and cut back 15mm from the soldered tip of the signal strand.
- Expose 7mm of silver wire on both strands, twist together and tin with Audio Note solder.
- Take the remaining black RCA plug, dismantle and thread the back portion onto the Litz wire (correct way round).
- Tin the earth connection part internally, near the split and solder the earth wires to this point.
- Thread the signal wire through the earth connection part and the signal post part and solder, try to keep the wire contained within the signal post part by the solder gap.
- Fit all the RCA plug parts together and tightened the grub screw, but not too tight so as to penetrate the wires, you have now completed both terminations.
- Repeat the same process to create the red signal wire.
You will have noticed that one end will have a blue marker on the cable this marks the signal source end (CD, tuner etc.)