Modding an ANK EL34 Level 4 C-Core – A journey down the rabbit hole.
One of our customers has sent in a write-up of his journey modding an ANK EL34 Level 4 C-Core amplifier, from initial build through to its current state, along with images of the different build stages!
With no further ado, heres R.T.'s words on the process:
"Ok. Off the bat let me say my journey with this amplifier has at times been a rocky one. Don’t get me wrong I love this amp, it’s been my baby for the best part of 2 years now and has been through three rounds of modifications (excluding the first build), having some serious money spent on valves and parts before I finally felt that I had reached the end of my journey. All parts excluding valves were supplied by the awesome guys here at HifiCollective with email support from the ever helpful Nick putting up with my inane questions.
Original Build
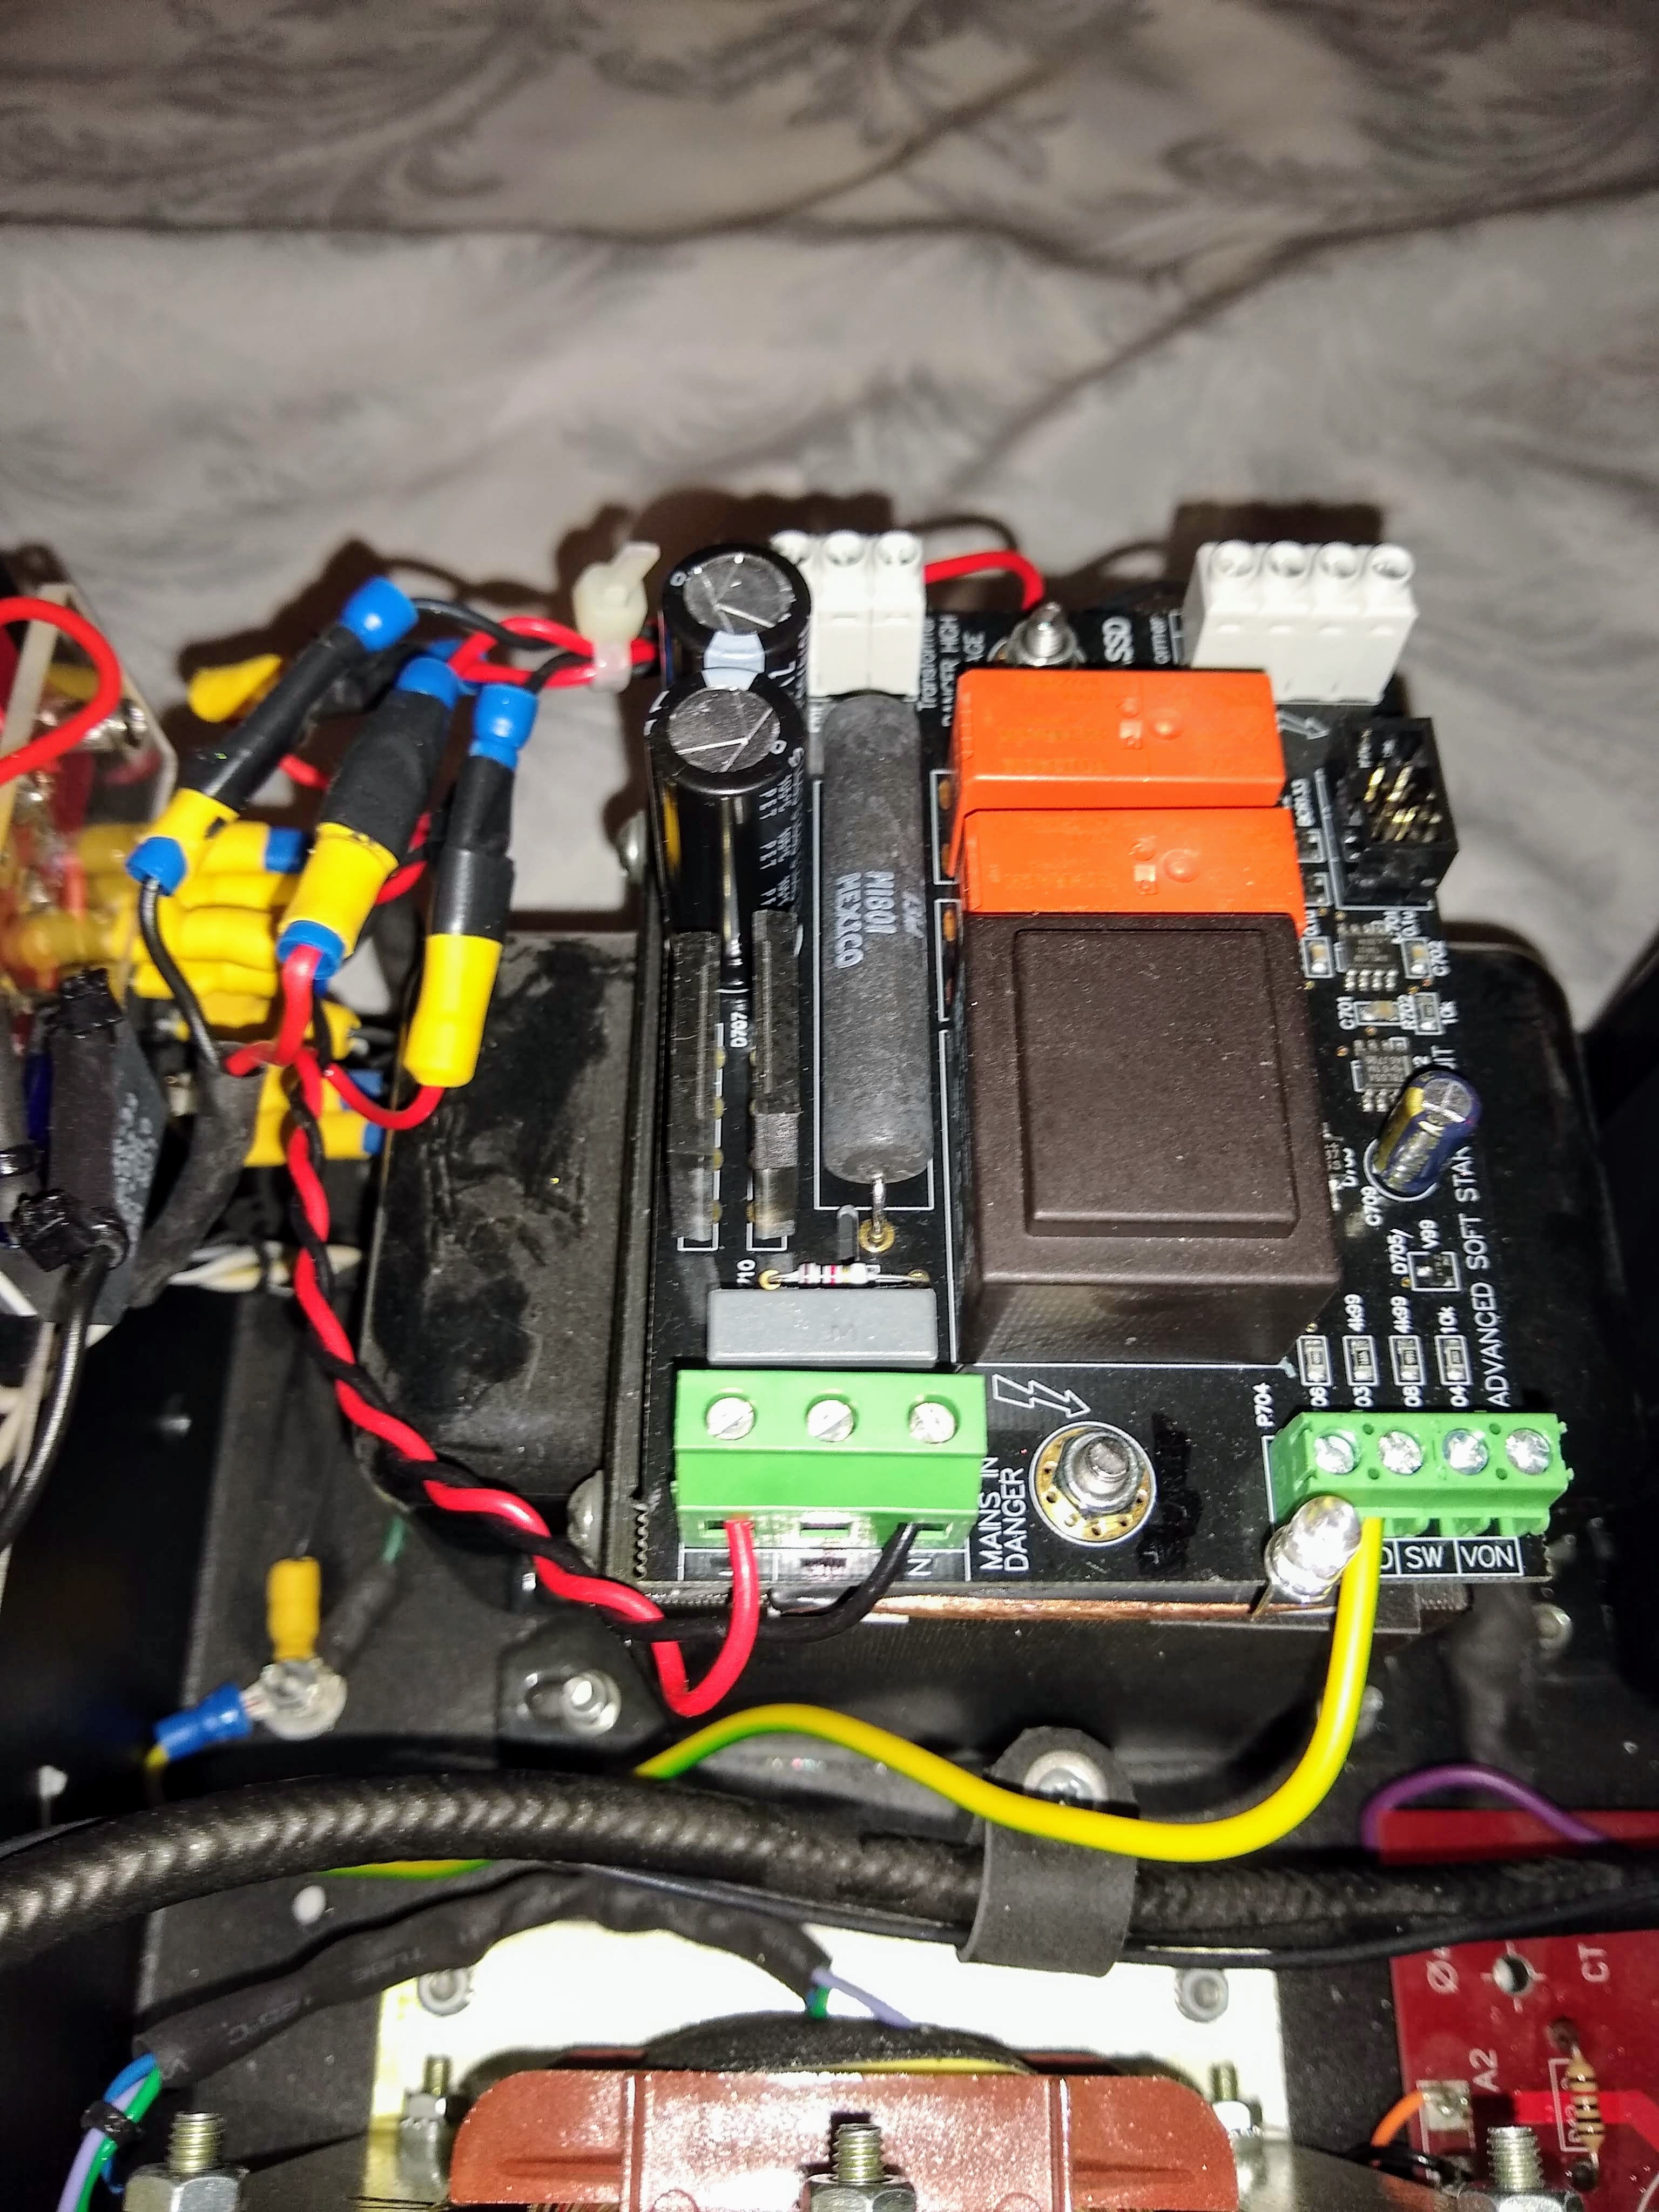
Included below are a selection of images taken from my original build.
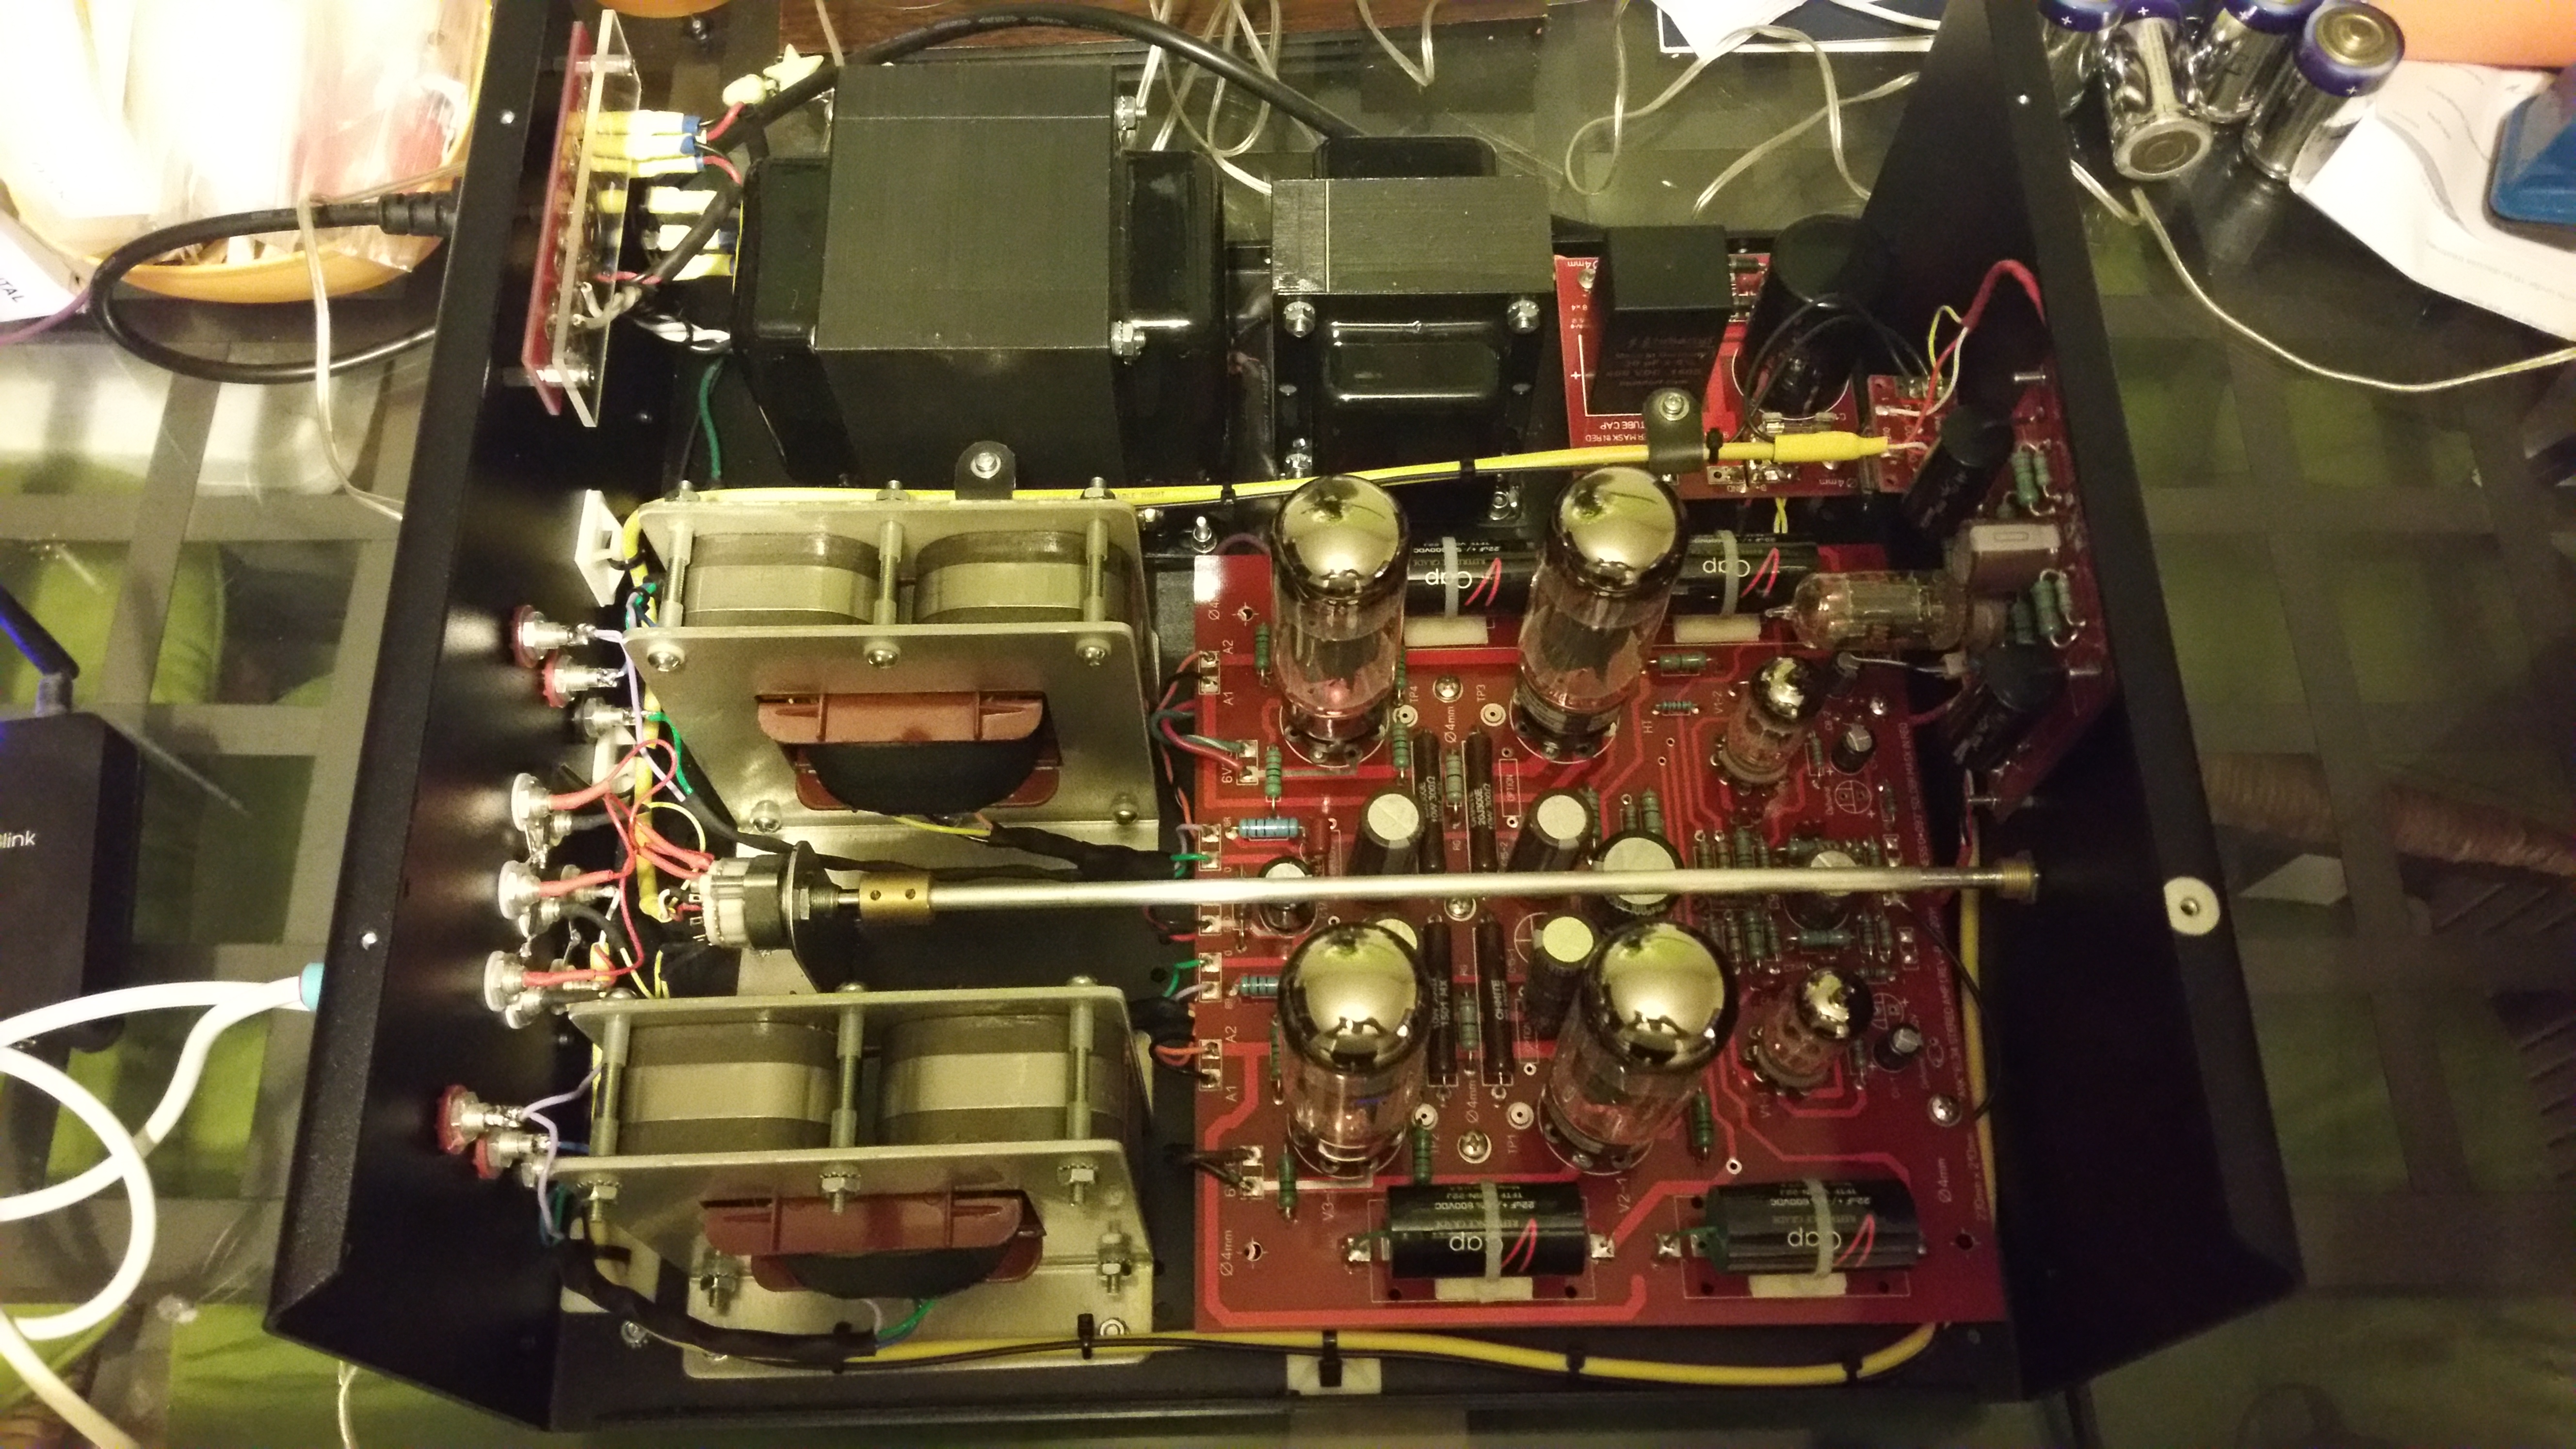
Included in the original build:
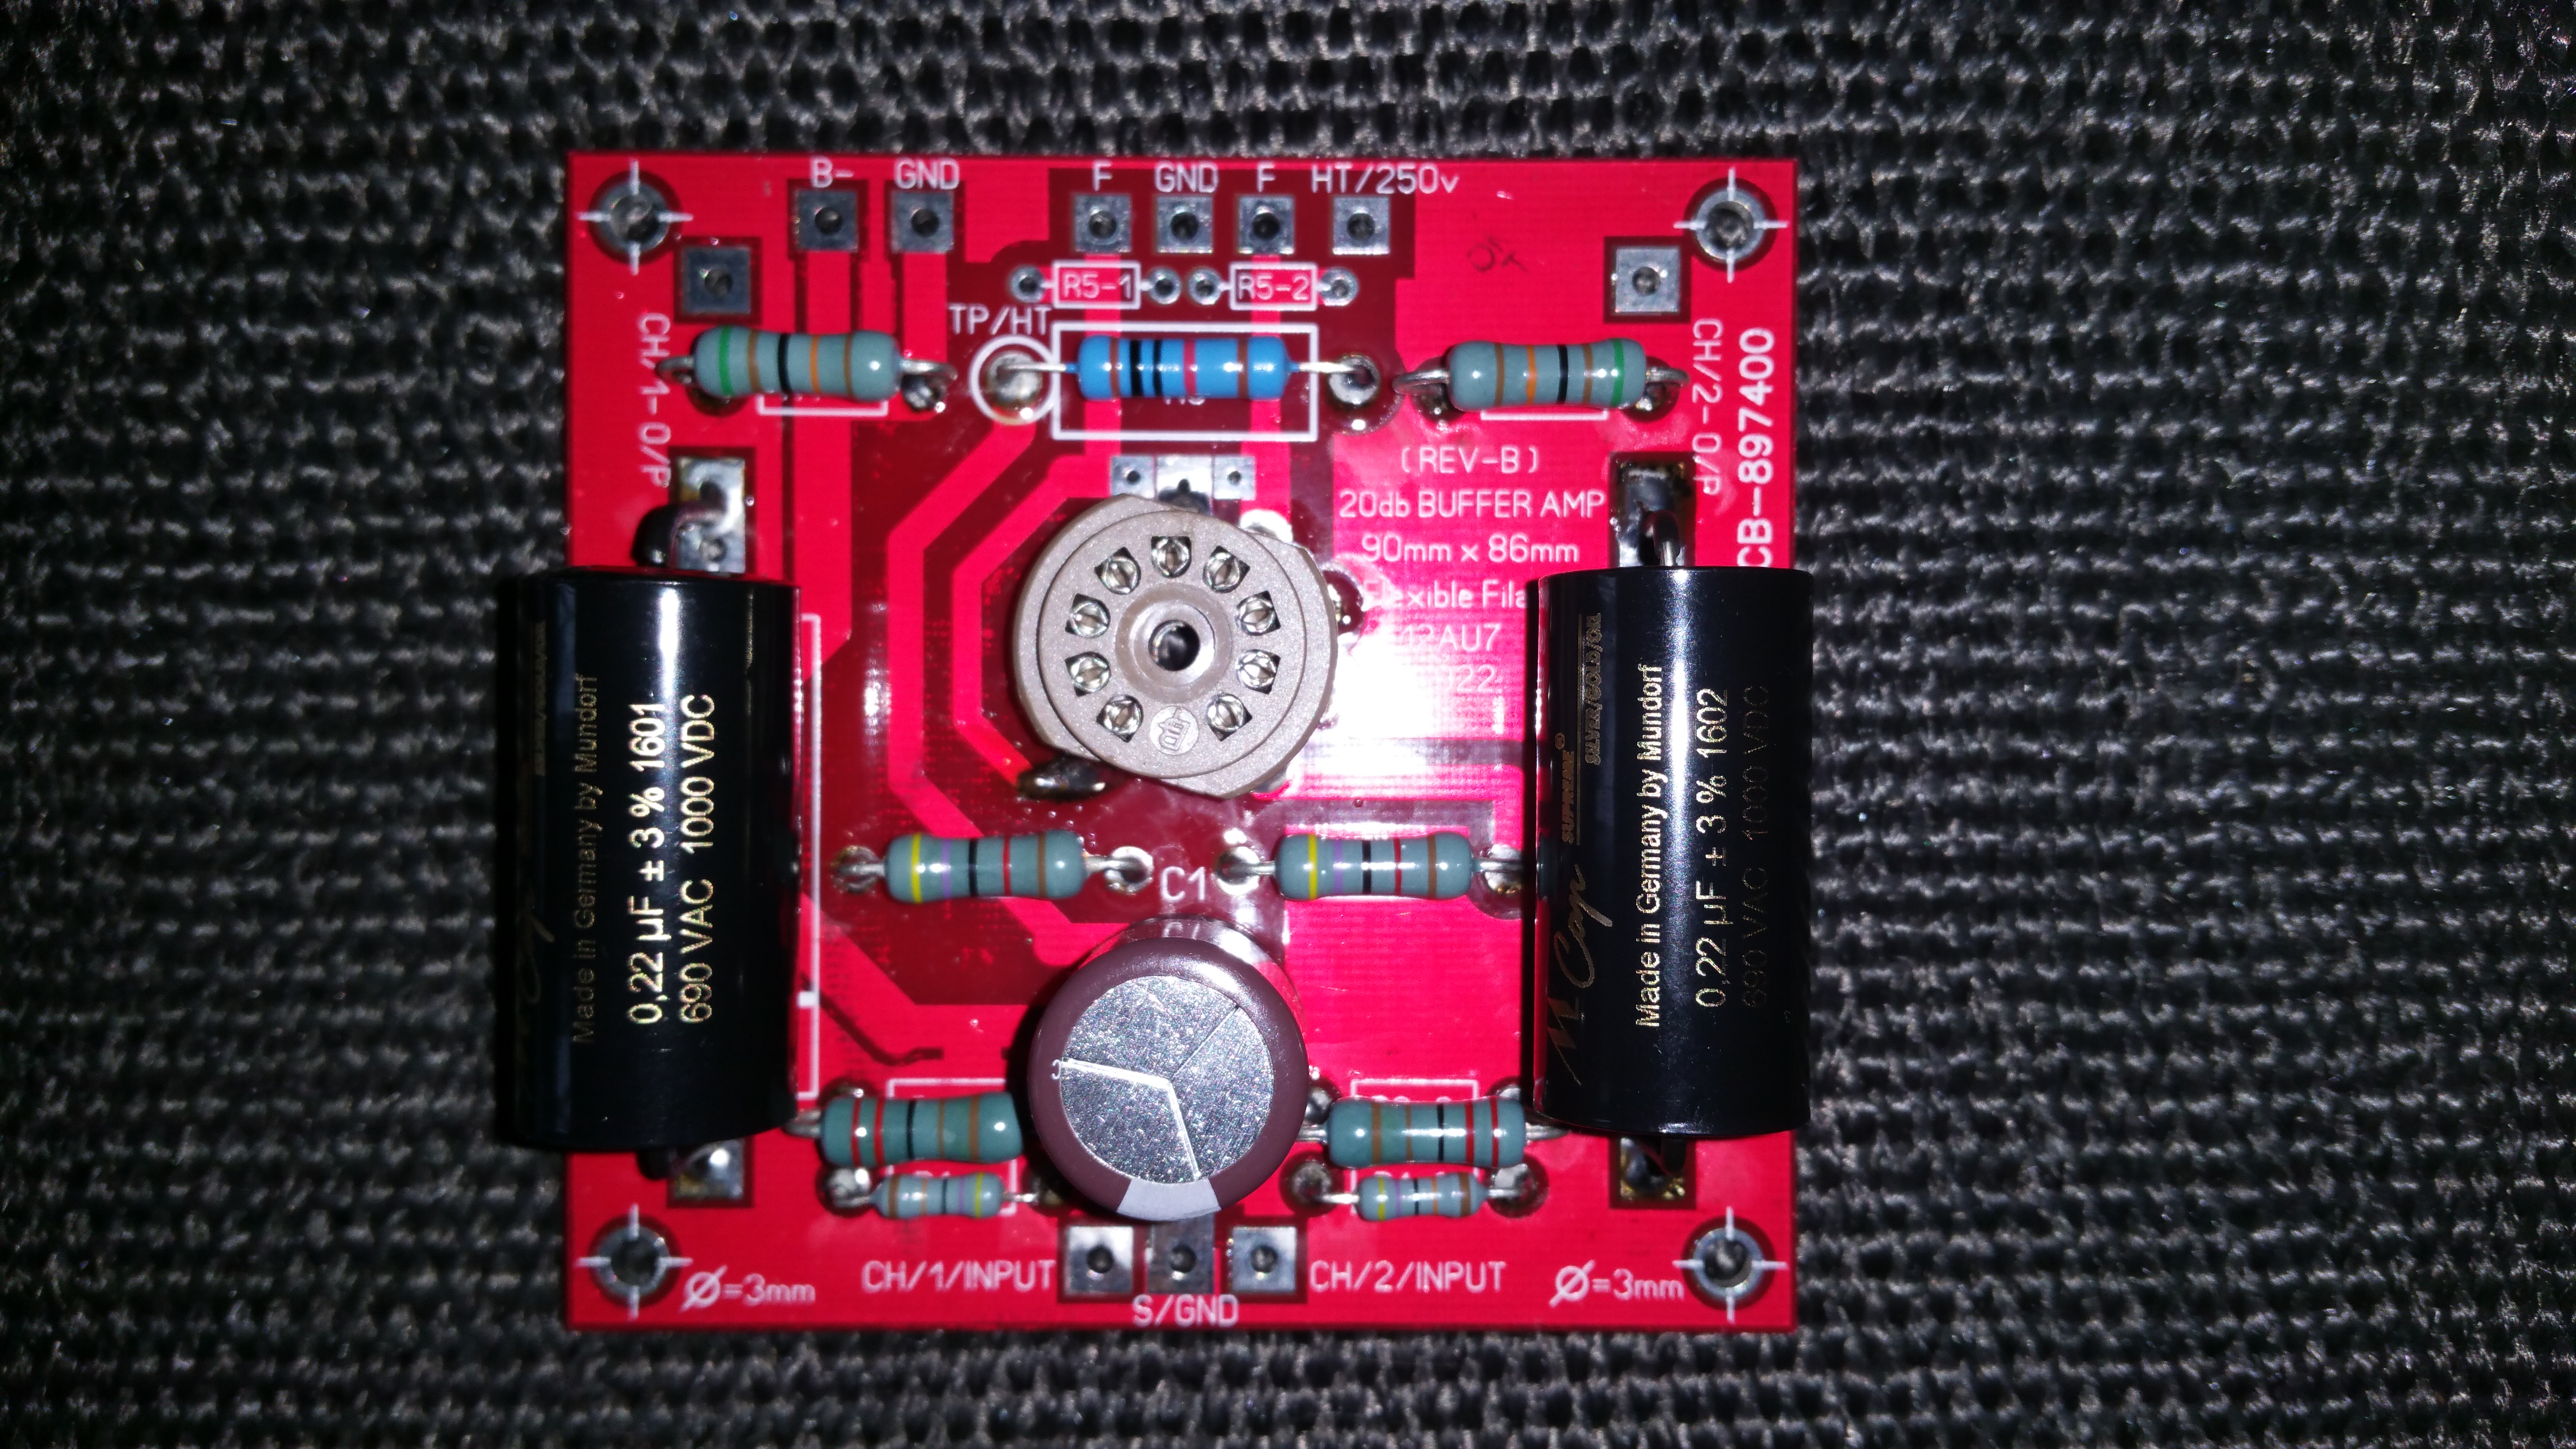
- 2x Mundorf Supreme SGO caps on the pre.
- 4x V-Cap TFTF caps on the EL34 board.
- The supplied all Takman metal film resistors.
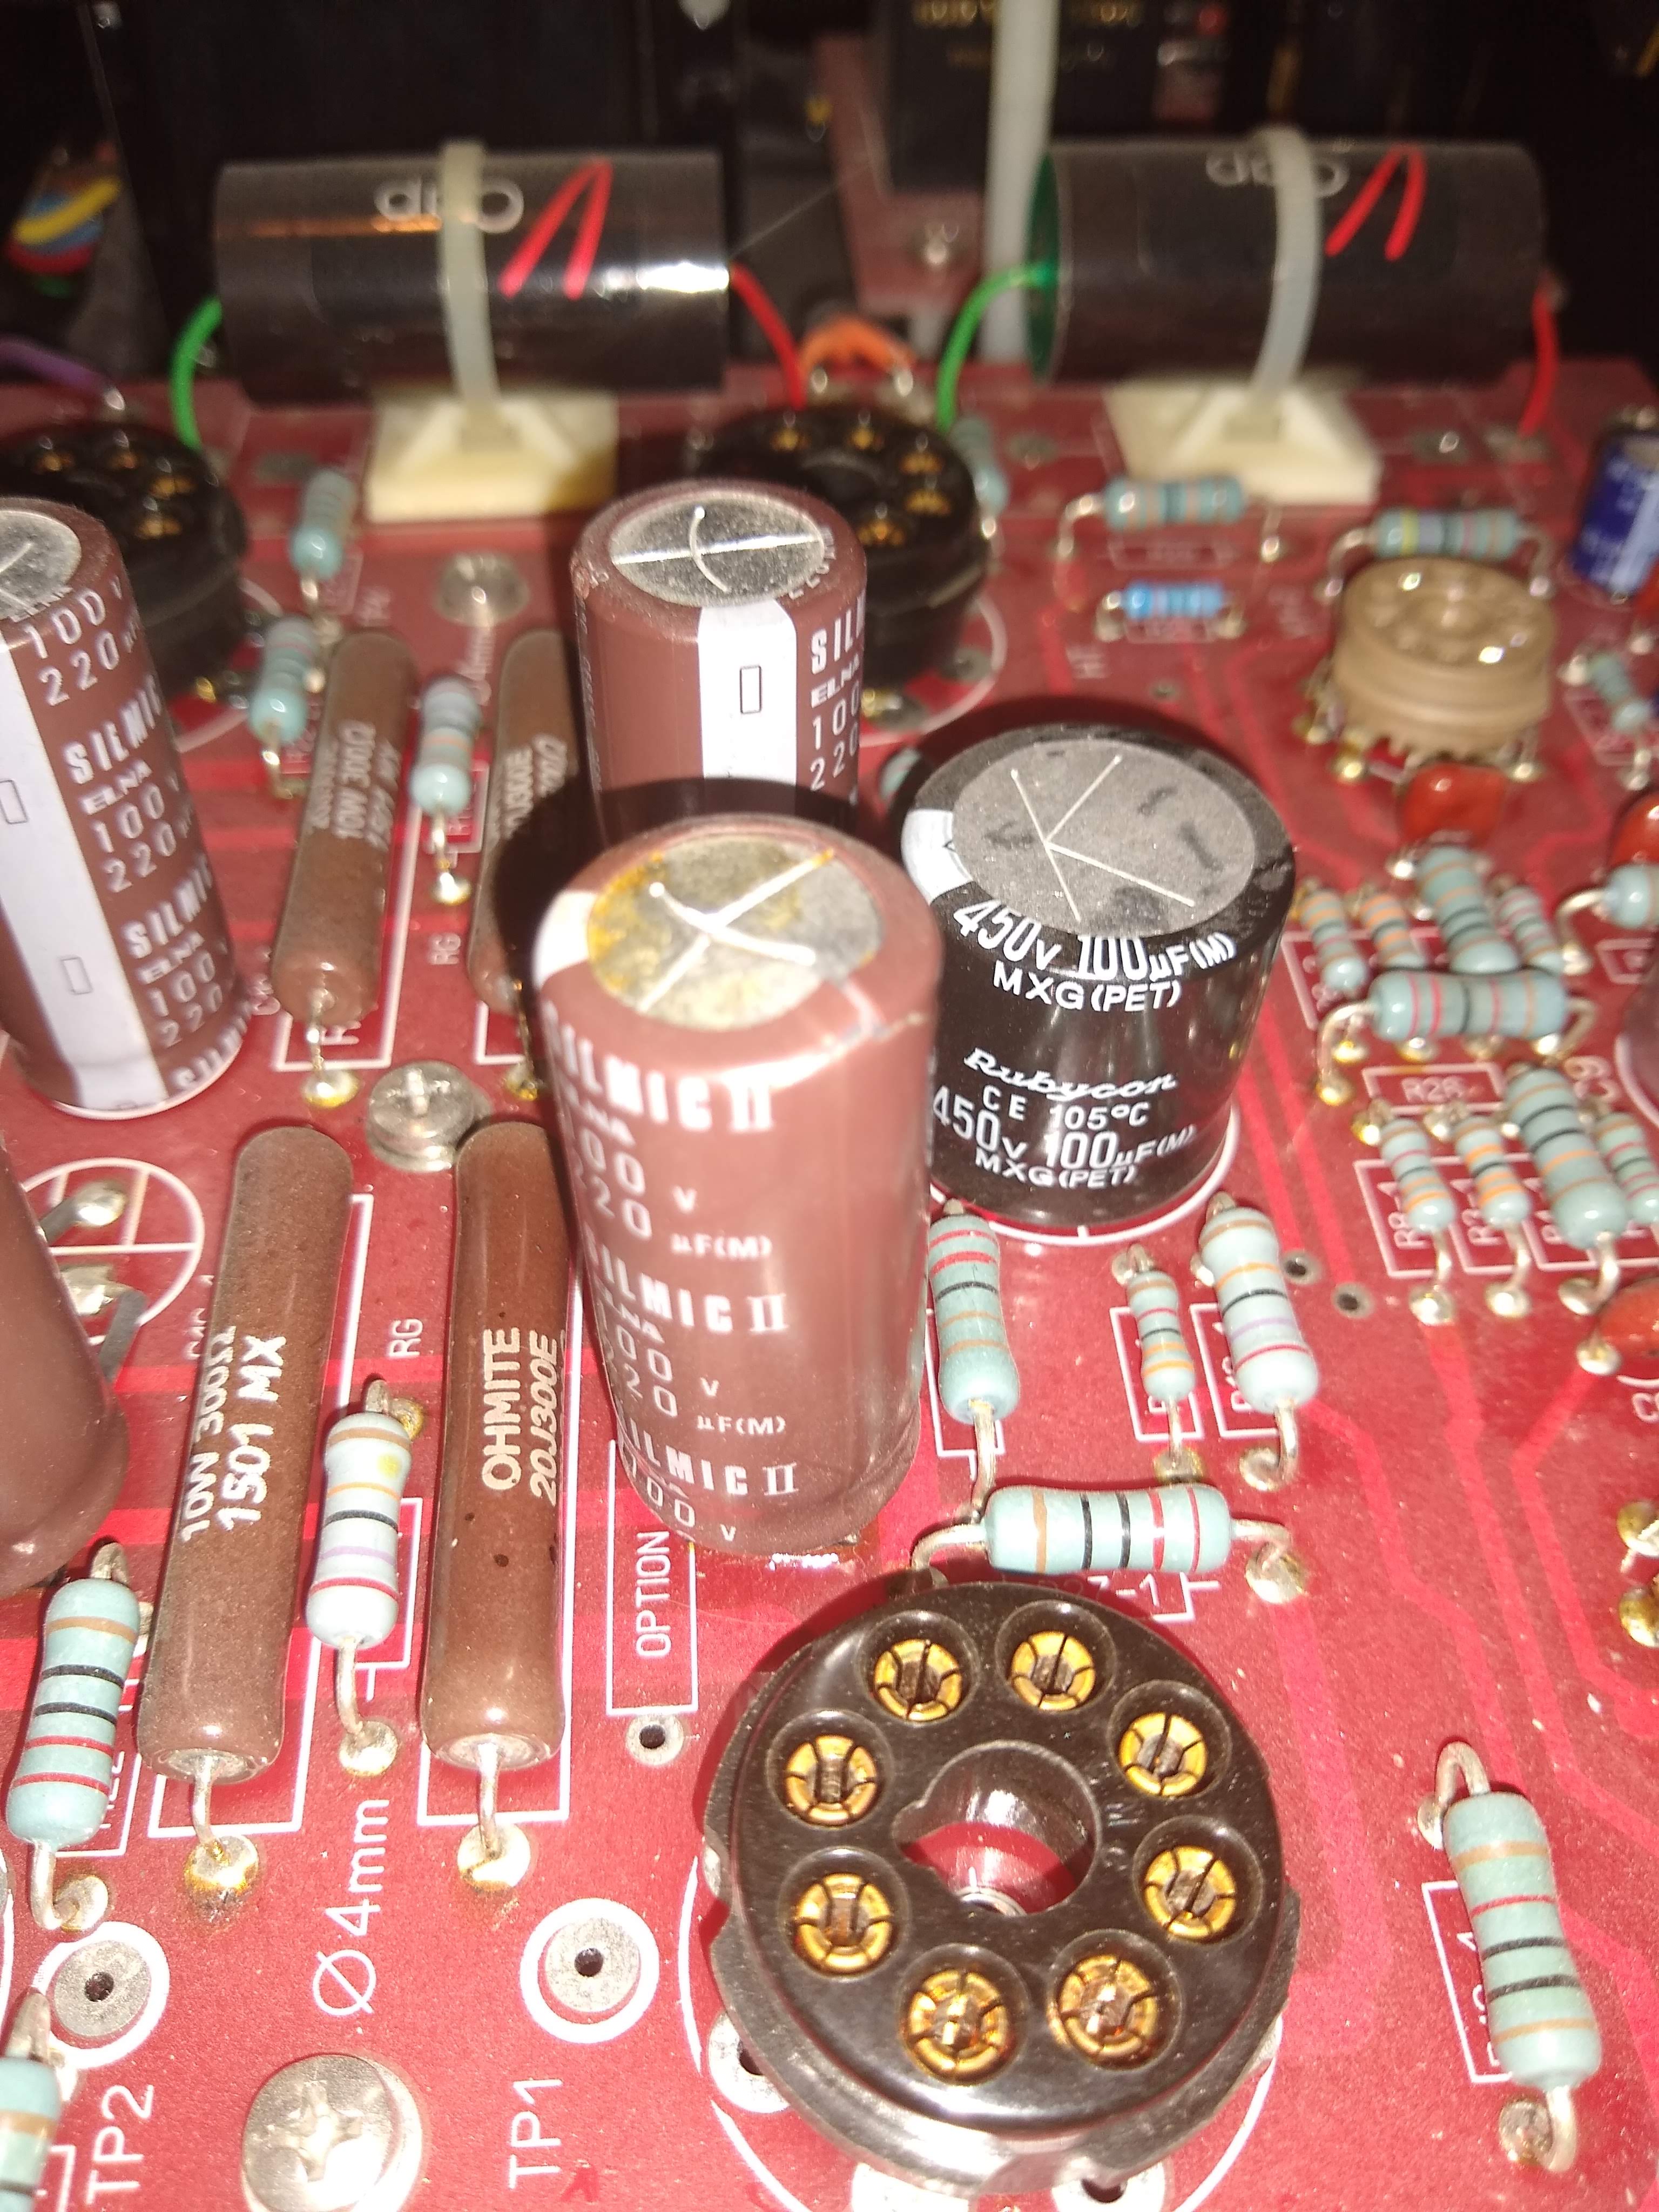
- Threw out the supplied caps for the cathode bias and replaced them with Elna Silmic II.
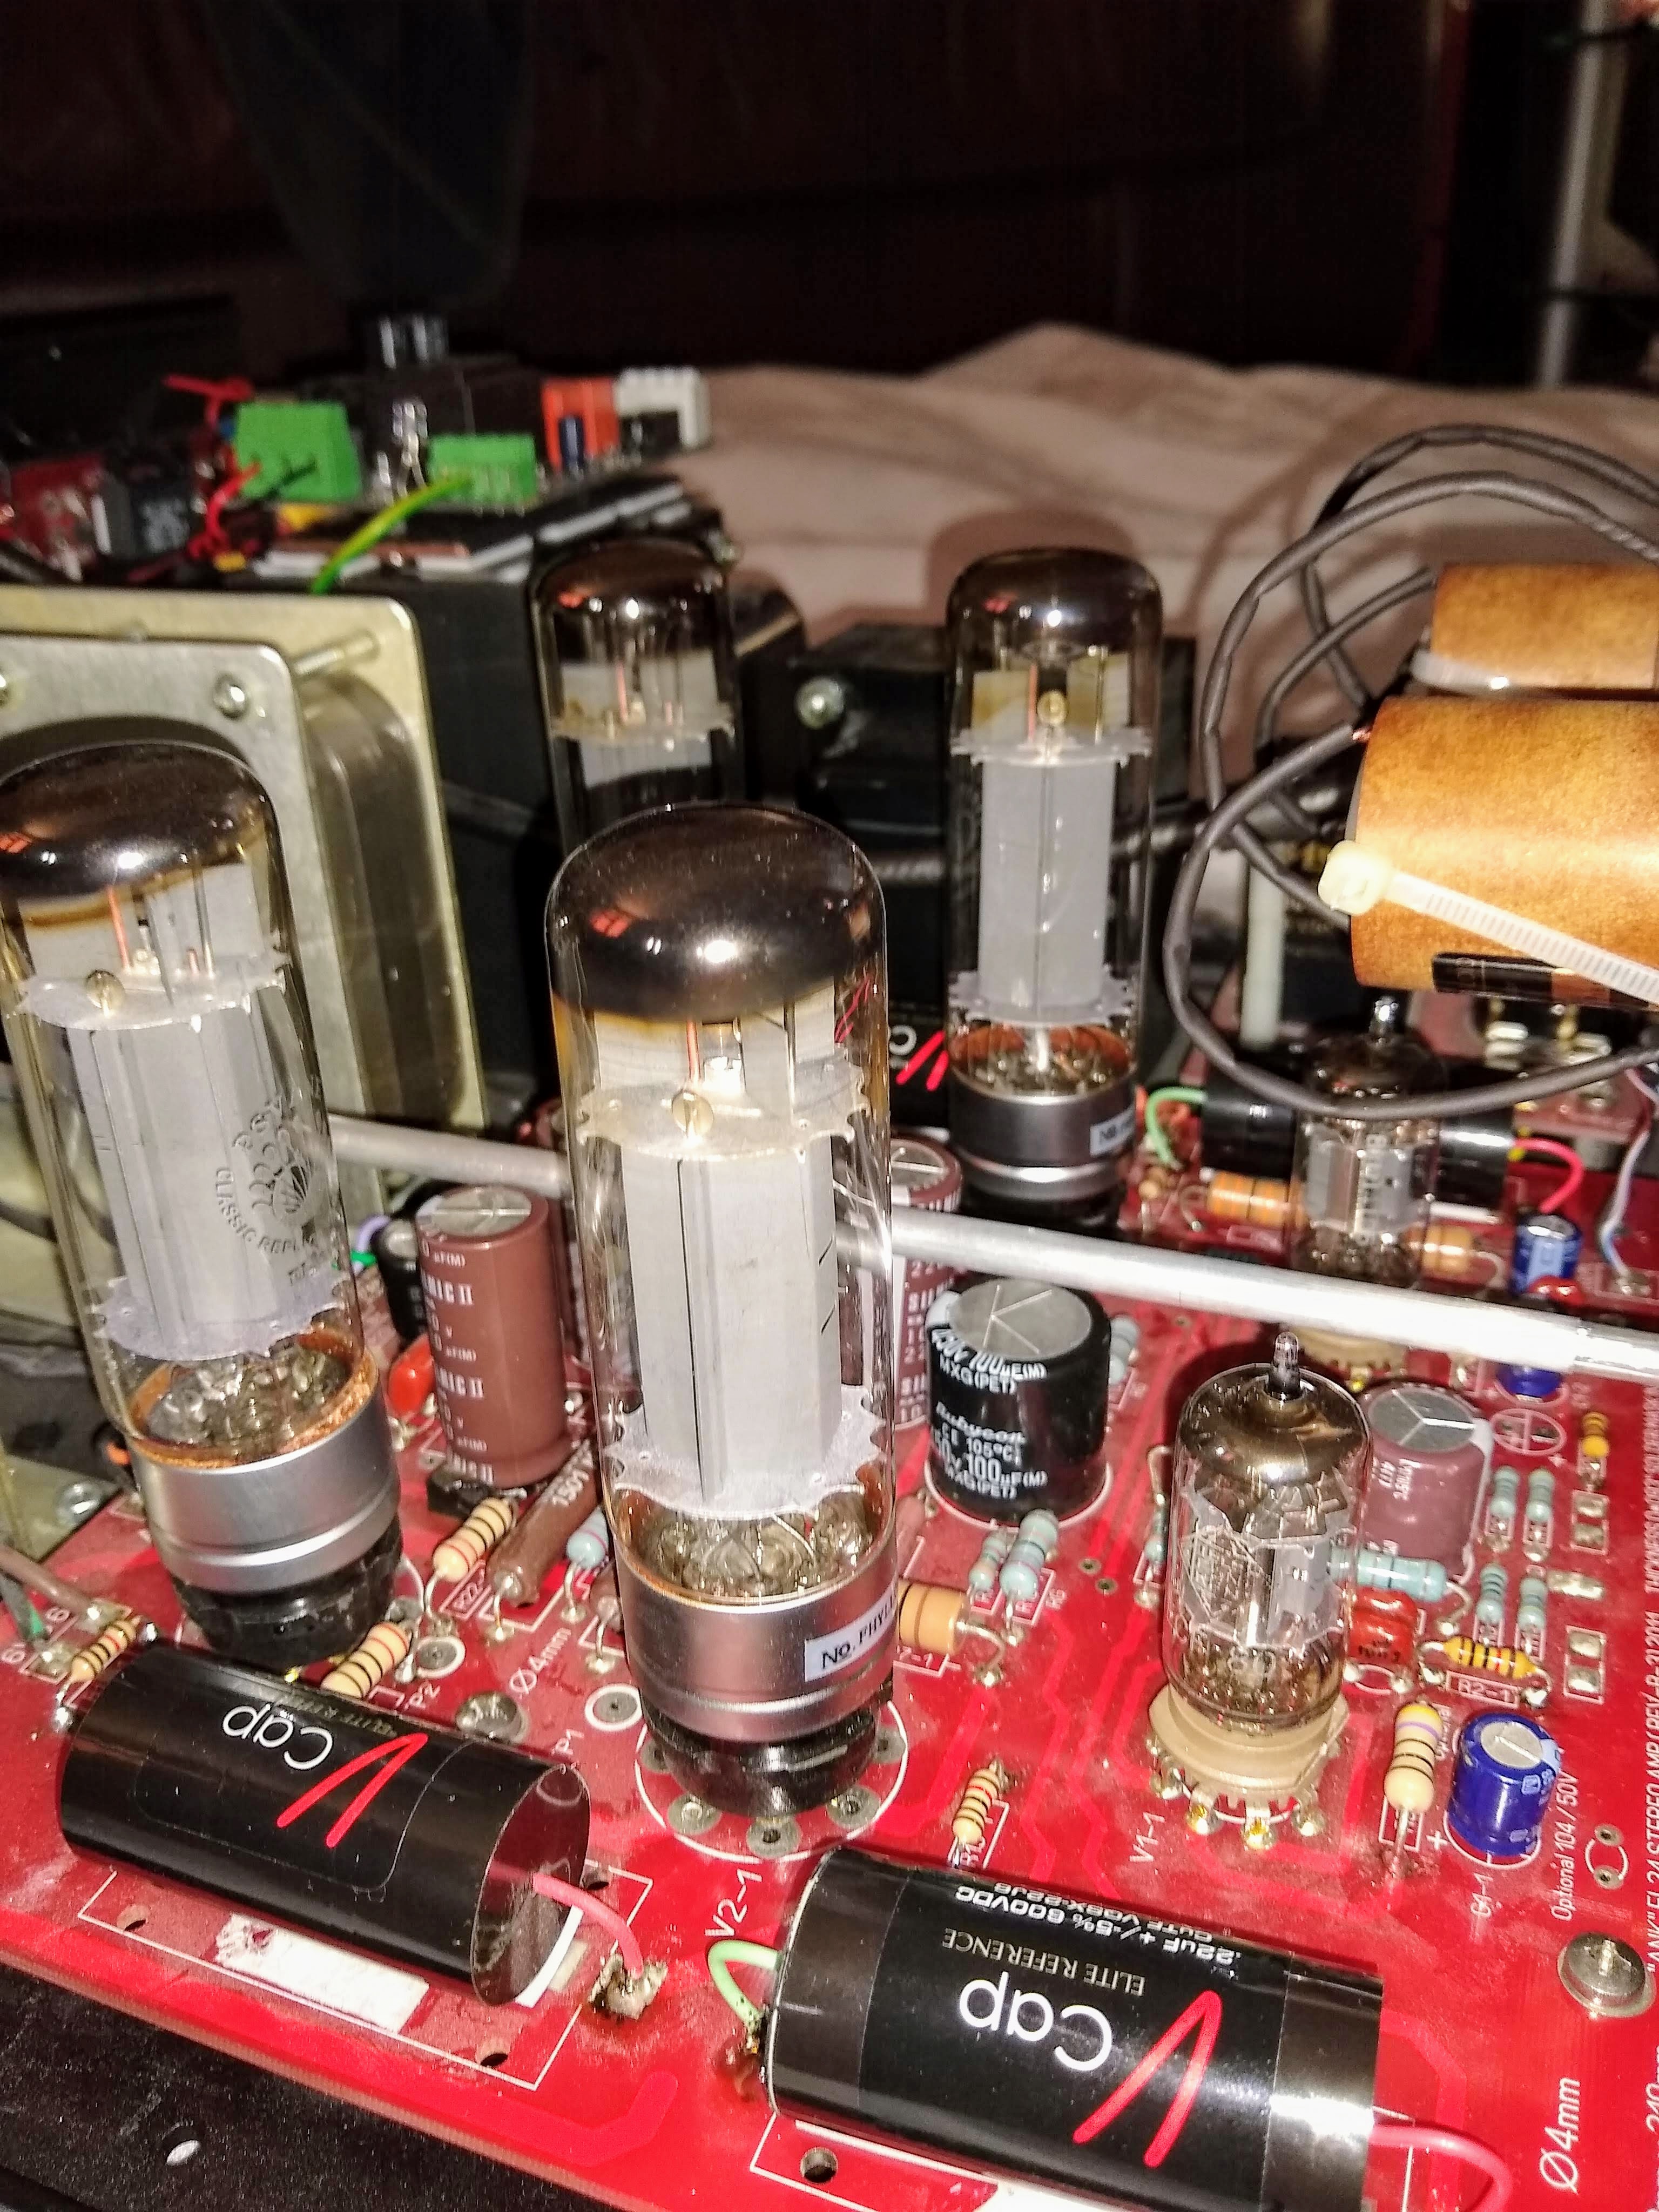
- 1x RCA 12au7 clear top on the preamp section.
- The supplied ECF80’s that came with the kit in the second stage.
- 4x TAD EL34B for the main amplification.
- Held together with AN 6% Silver solder.
I found this configuration nice…ish, maybe to overbearing with IMO slightly overzealous highs. After a bit of tube rolling I concluded that what I didn’t really like was the emphasized highs coming from using the Mundorf’s, they had to go. As nice and clear as they were it felt maybe a little fake, to much sparkle perhaps. ANK also only supplied one half of the AN-A cable for connecting the input to the pot and expected me to use that. Why, I’ll never know. Wiring this way caused terrible cross talk between channels so that had to go as well.
Round 1
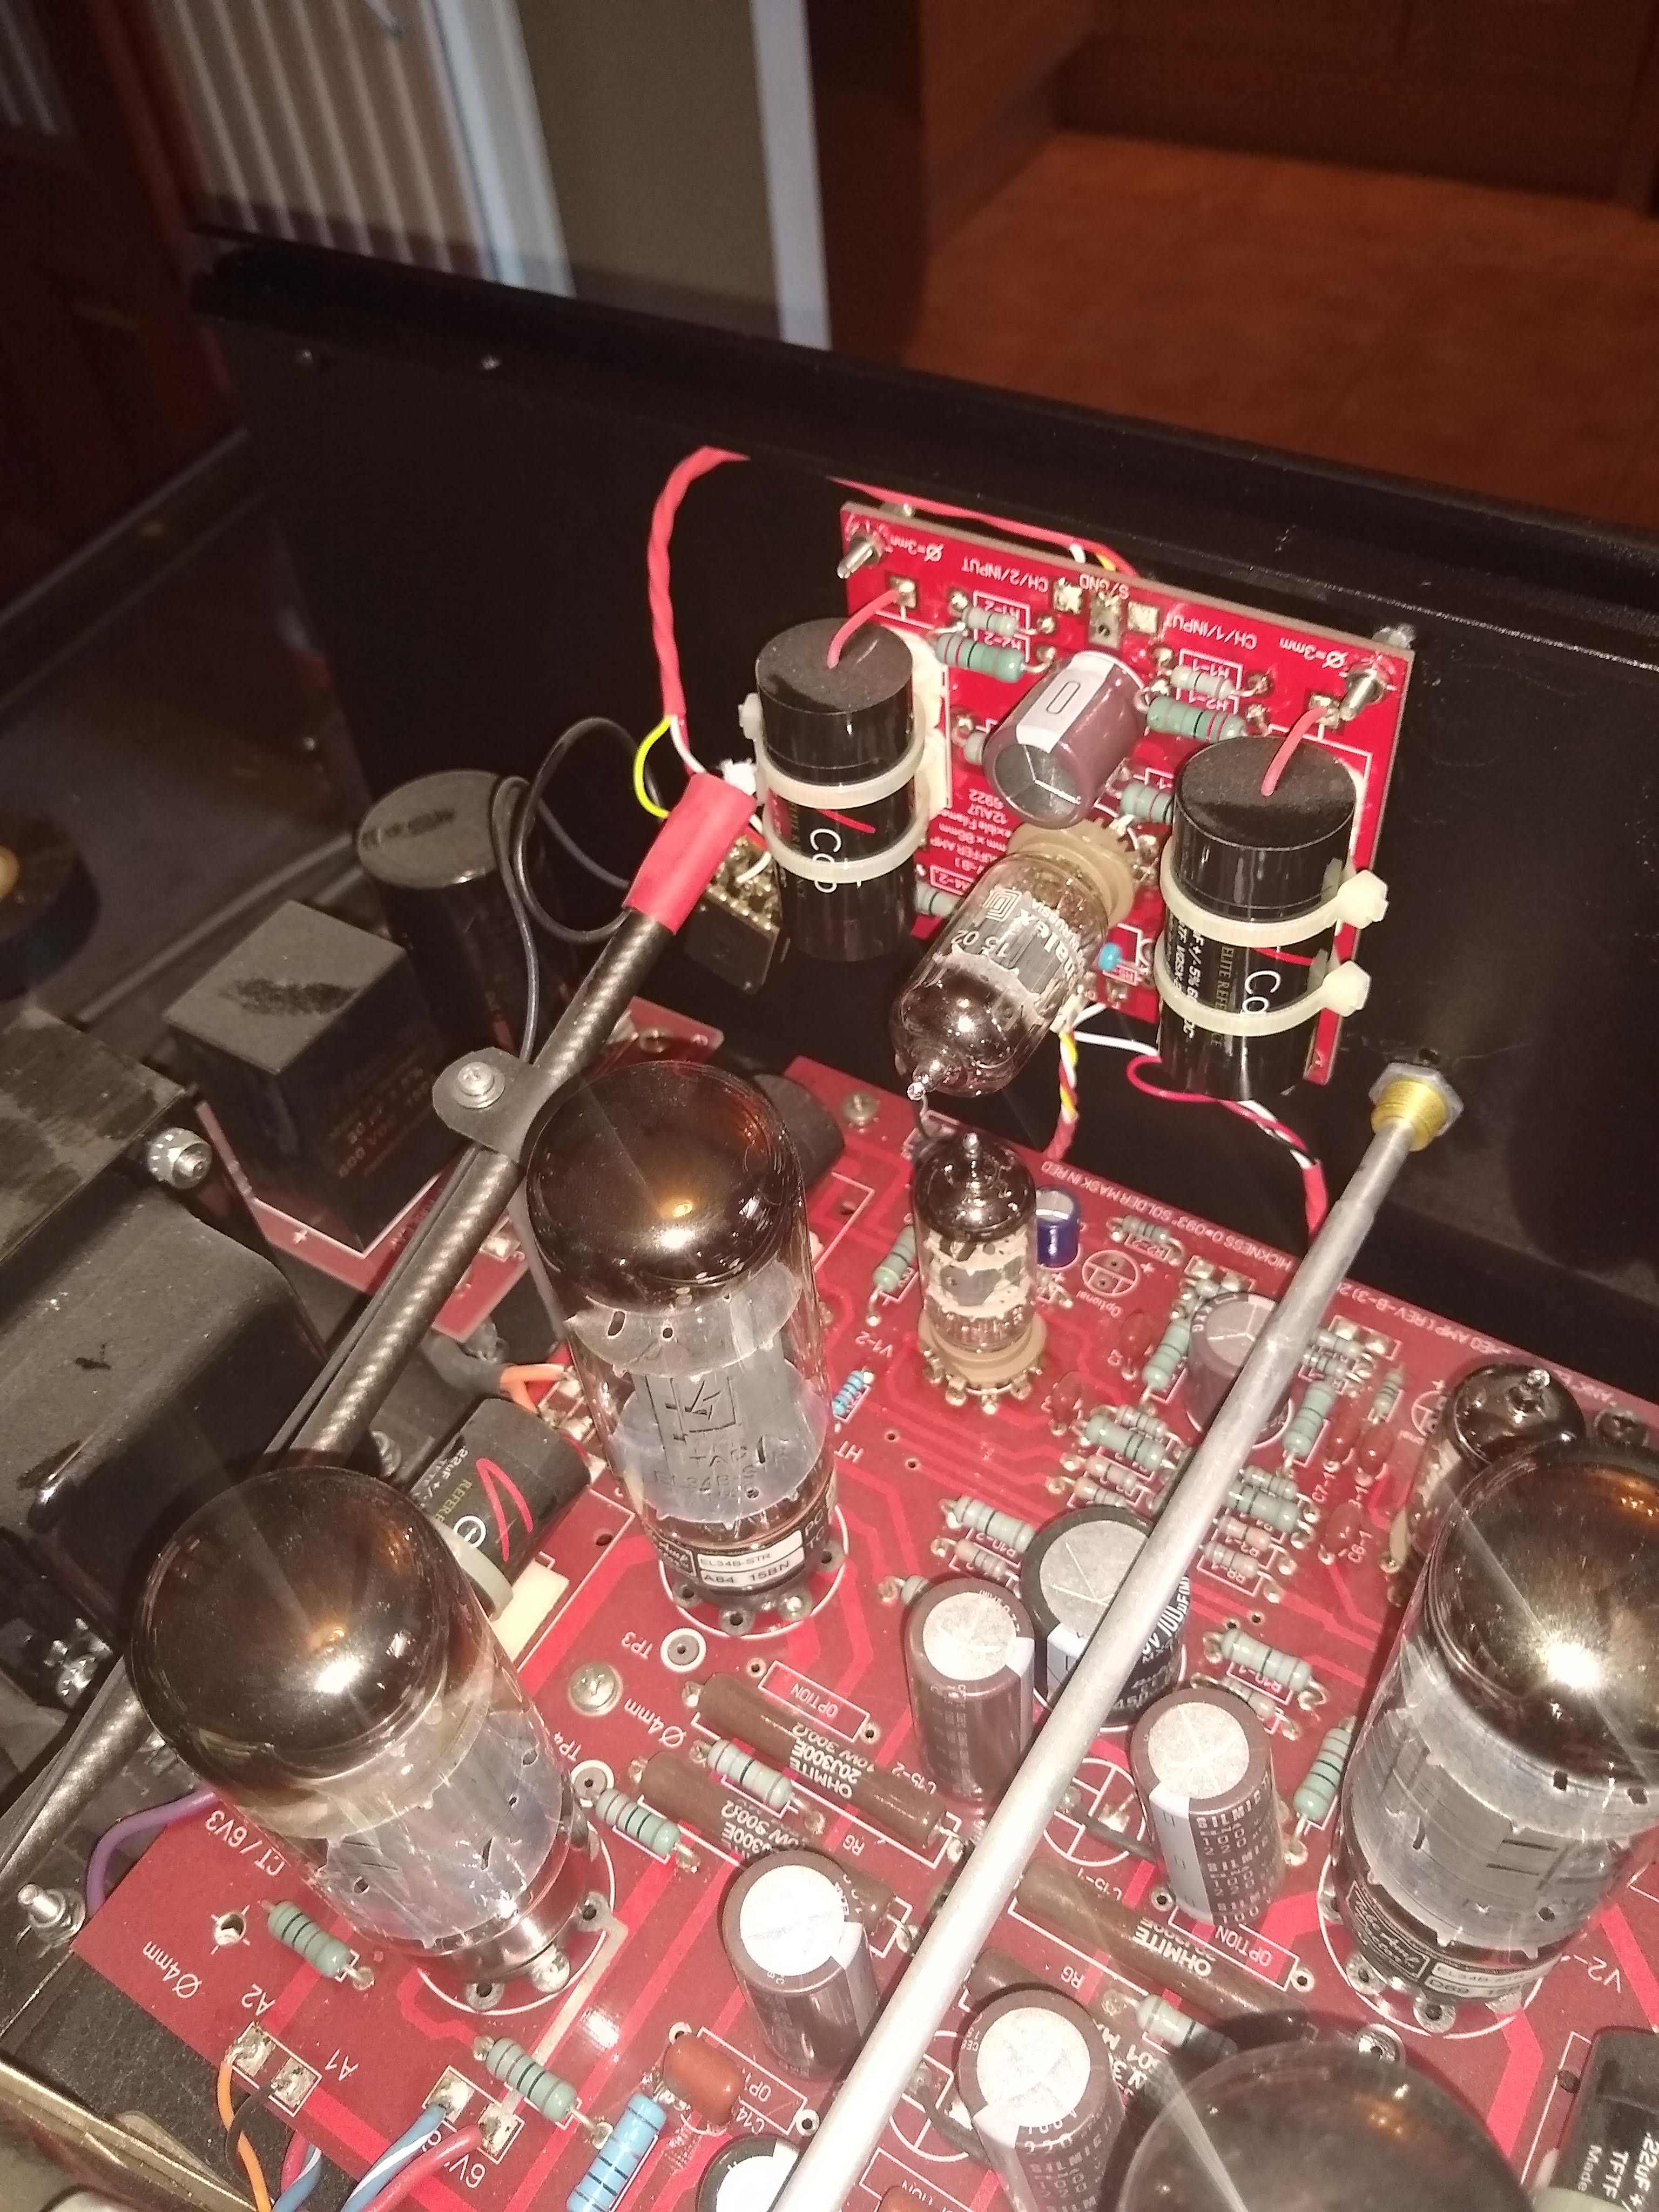
So here came my first round of changes. First I replaced the Mundorf’s with 2x V-Cap CUTF. The interconnect between the input and pot was changed to a length of Yarbo Audio pure silver interconnect. At this point I started thinking, while I’m here messing around with the pre and interconnect why not swap out that original Alps Blue for something different, hopefully better. So out that came as well to be replaced by the superb Audio Note 100K dual log. This pot has a lovely smooth action and sounds absolutely fantastic.
At this point I also invested in some lovely PSVane Phillips Holland replica EL34’s. Expensive yes, but these valves really are nice, beautifully built with a super smooth sound that really helped tame the zealous, powerful nature of the amplifier.
Wow, a big improvement! Everything was now sounding more coherent, smoother and generally more neutral with a better, bigger soundstage. Happy? Yes. Could I make it even better? Absolutely…
Included in this 1st round:
- 2x V-Cap CUTF on the pre.
- Yarbo Audio pure silver interconnect.
- Audio Note 100K dual log potentiometer.
- 4x PSVane Phillips Holland replica EL34.
Round 2
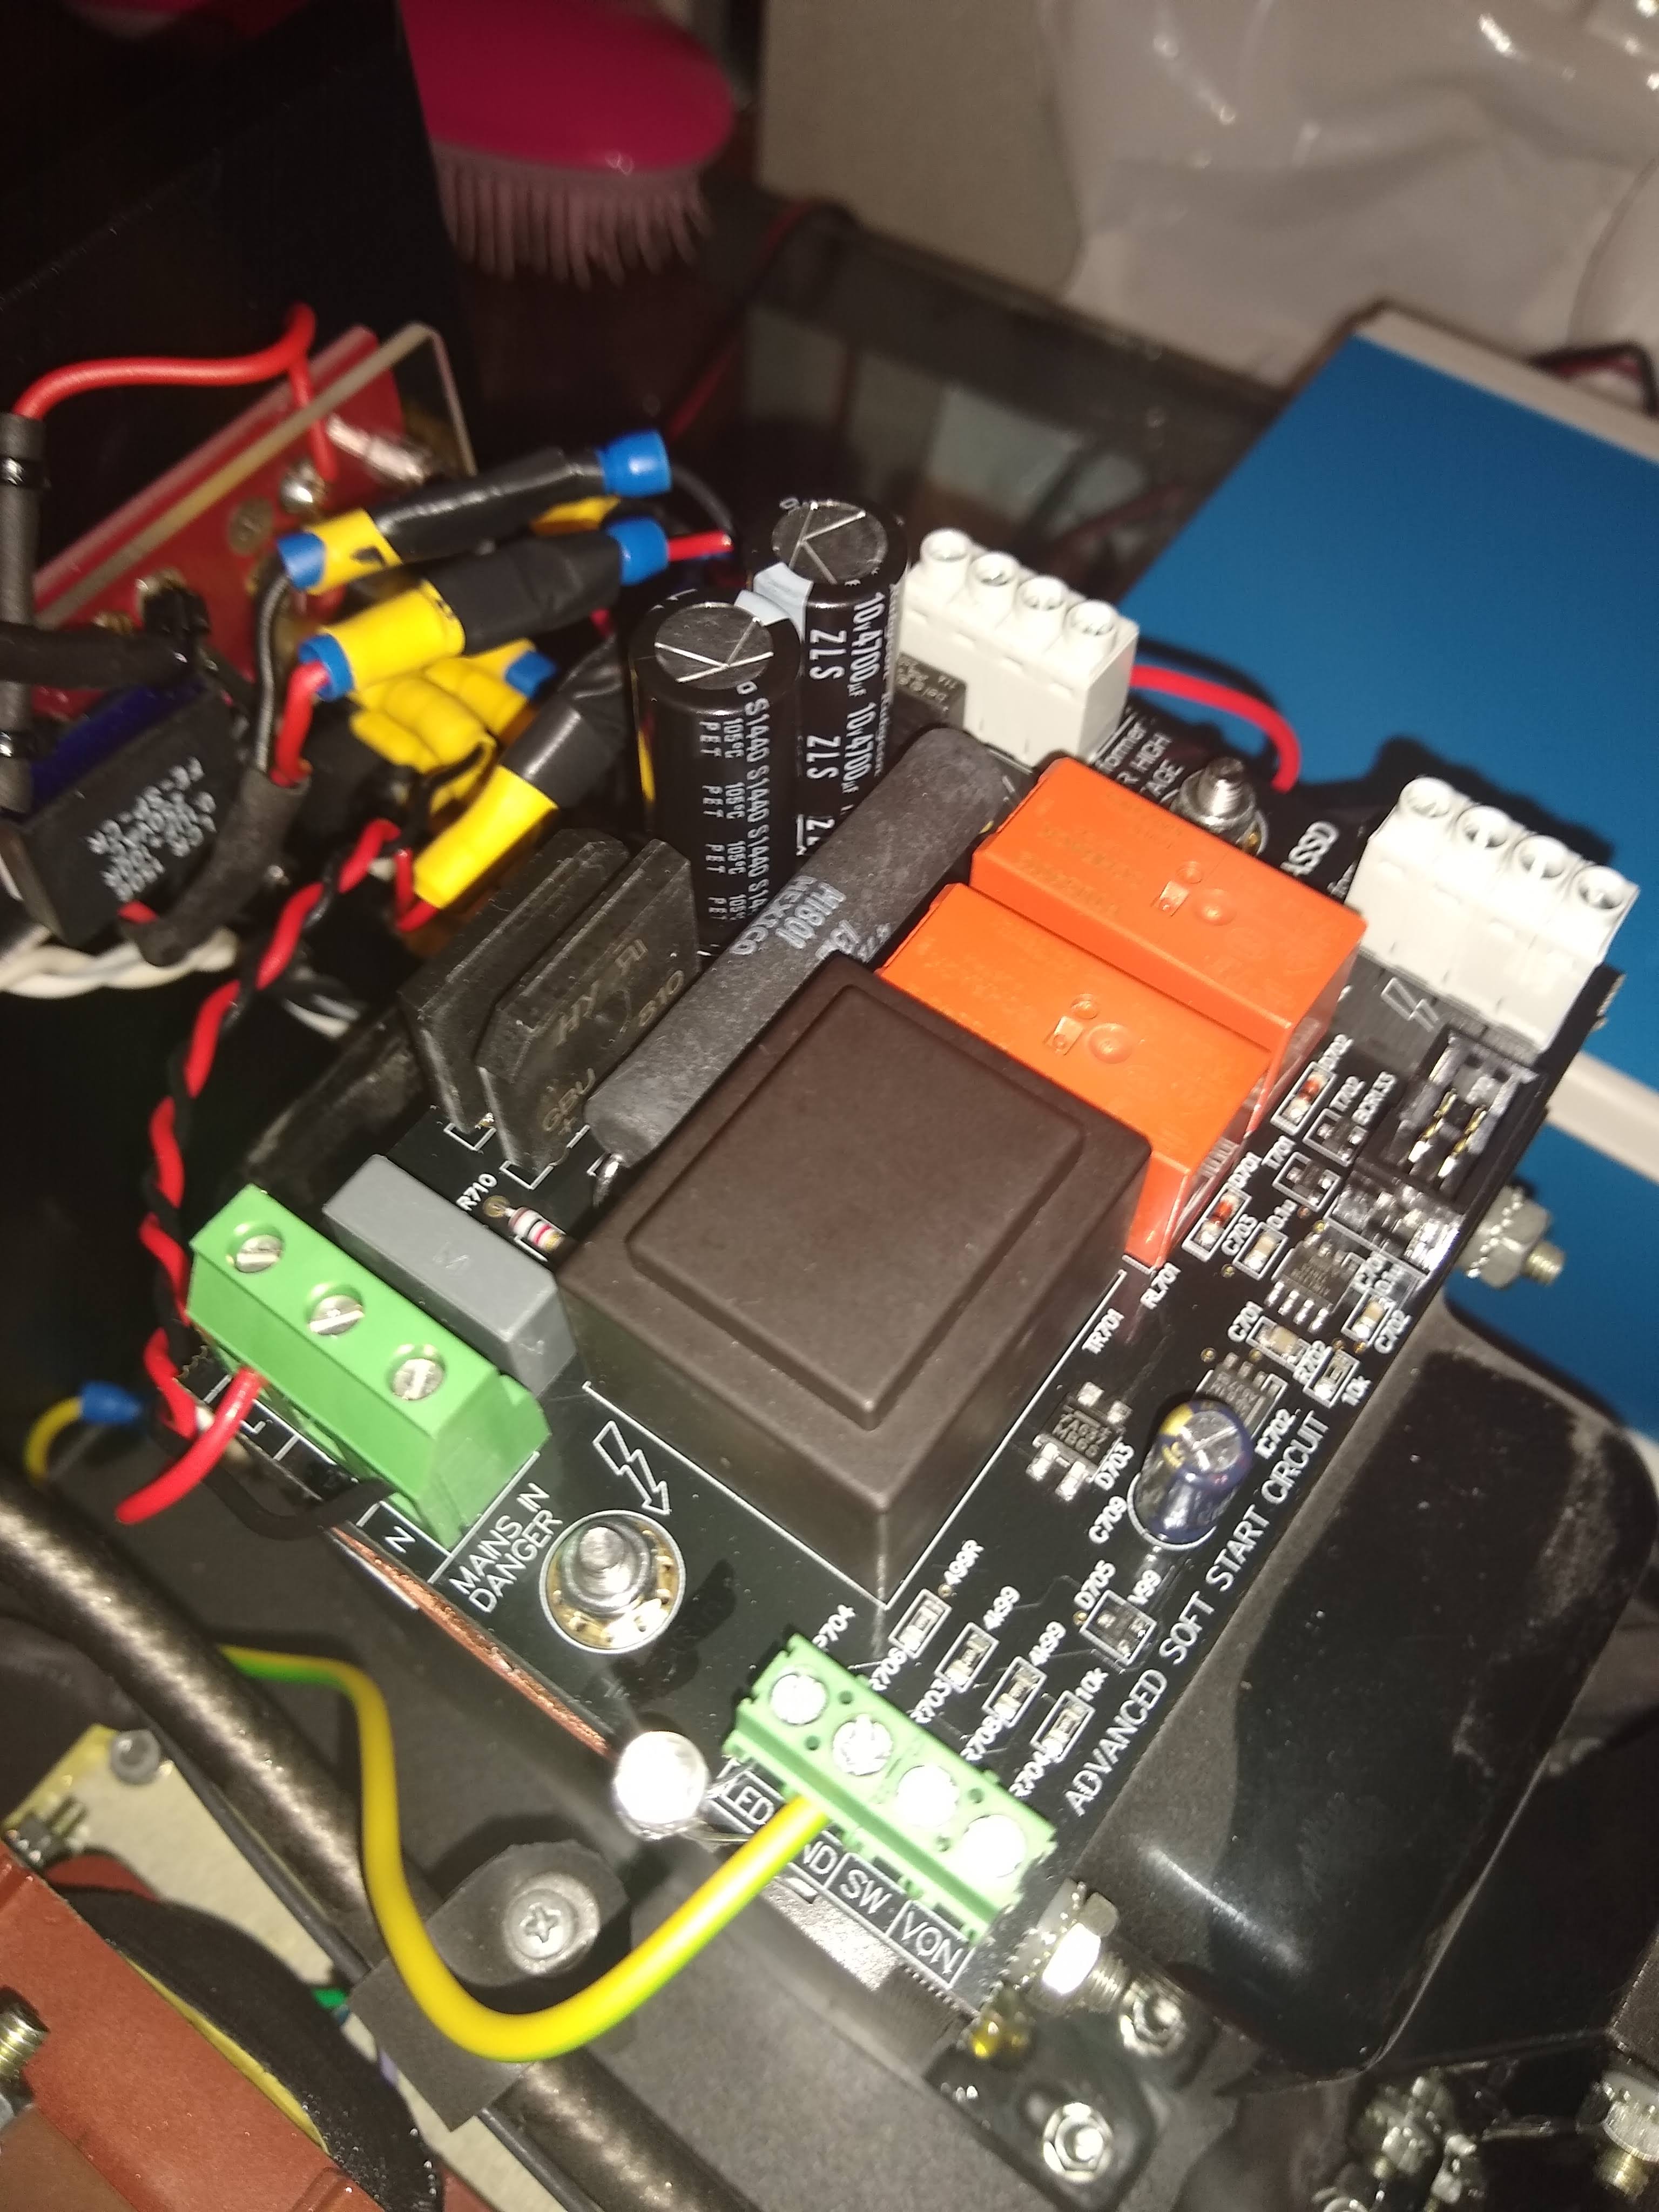
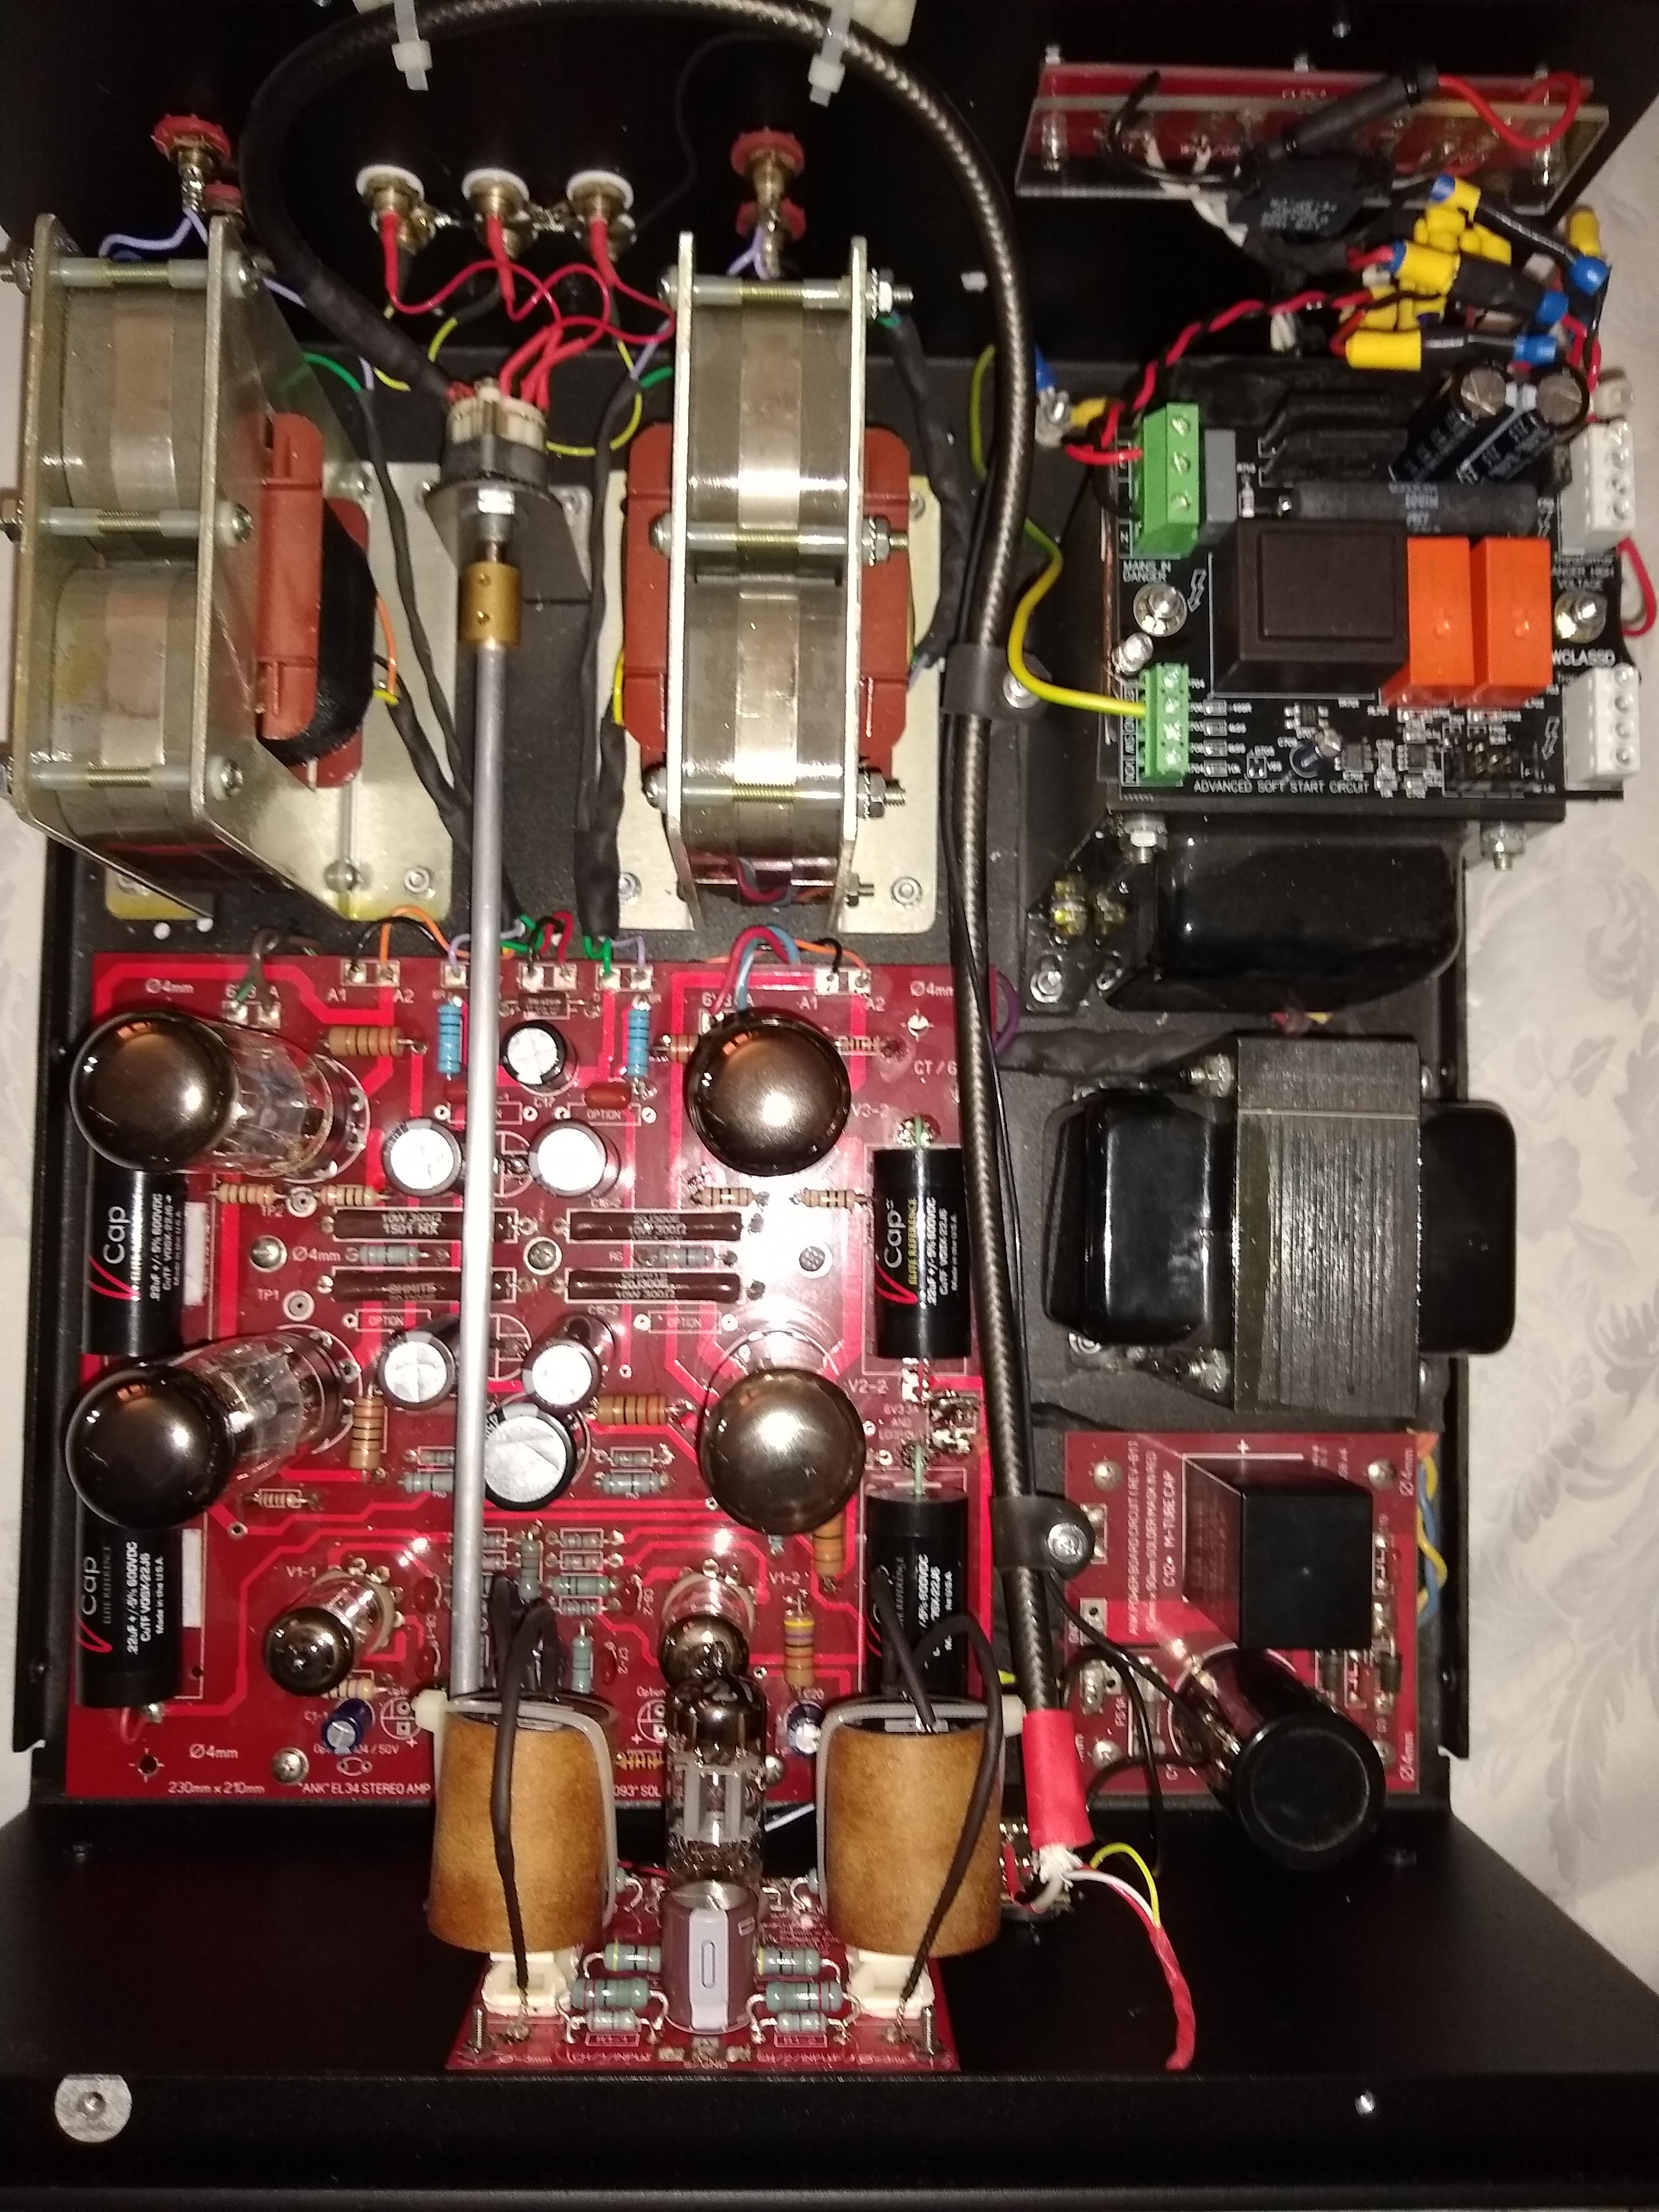
I decided to make a second set of alterations. I’d been noticing loud pops from the speakers when turning the amplifier off. This got me thinking that some sort of snubber might be in order here on the power supply. I actually settled on using two snubbers. One across the power switch and one across the positive/negative of the 240v in on the power supply. This actually worked well reducing the noise substantially. I also opted for a pretty cool bit of kit by Dexa Technologies. A Soft Start / DC Filter that gradually raises the voltage at turn on across the power supply. As for the DC filter function that’s just an added bonus really. No gain in sound from these changes but all part of the journey none the less.
Included in this 2ndround:
- Dexa Technologies NewClassD Soft Start / DC Filter.
- 2x Snubbers – One readymade of the Maplin shelf and one put together by my own hands.
After those mods I started thinking to myself I could really do with running this sucker in for a couple of hundred hours to see if I can get those predicted improvements from the V-Caps. After a bit of R&D and some Amazon shopping I’d put myself together a neat little artificial load box. Let’s get this thing cooking on the kitchen table…
This is the point where disaster struck!
I had reached around maybe the 230 hour mark when loud pop came from the amplifier followed by a puff of smoke. It turned out that as I was unable to hear the amplifier while it was connected to the artificial load I couldn’t hear any of the likely noise that’s coming from the left channel. As it turned out one of my original TAD EL34’s I was using for the burn in had gone short, this subsequently had the knock-on effect of causing one of the Elna Silmics to blow. This was the source of the pop and smoke. Thankfully nothing more major was damaged.
Round 3
After some panic part ordering from HifiCollective and a bit of repair work I had replaced the blown capacitor and its corresponding brother on the left channel. Phew, all back to normal. Now all I have to do is start listening and learn to trust that the amp isn’t going to break again. Check paranoia…
After some time listening I can confirm that I genuinely did notice an improvement where the caps had spent some time running in. However, I still wasn’t entirely satisfied. The overall sound was nice, very crisp and clear but just not quite doing it for me. I’d read on some capacitor reviews that V-Cap TFTF are very detailed and neutral but can maybe err on the side of sterile maybe a little lifeless. I think this is what I was experiencing. Call it real or placebo or whatever, the effect was real to me.
Then after some deliberation I decided to take that final leap down the hole and make one last upgrade to try to reach my final iteration. This time it’s going to need some serious investment however and to be on the safe side as I was still a little weary of leaving the amplifier running for a burn in period I built myself a cap burner circuit first. This is the circuit that Nick kindly featured on the blog a few weeks ago. You can probably find it a few articles down the list from this one (‘Capacitor Burn In Circuit’).
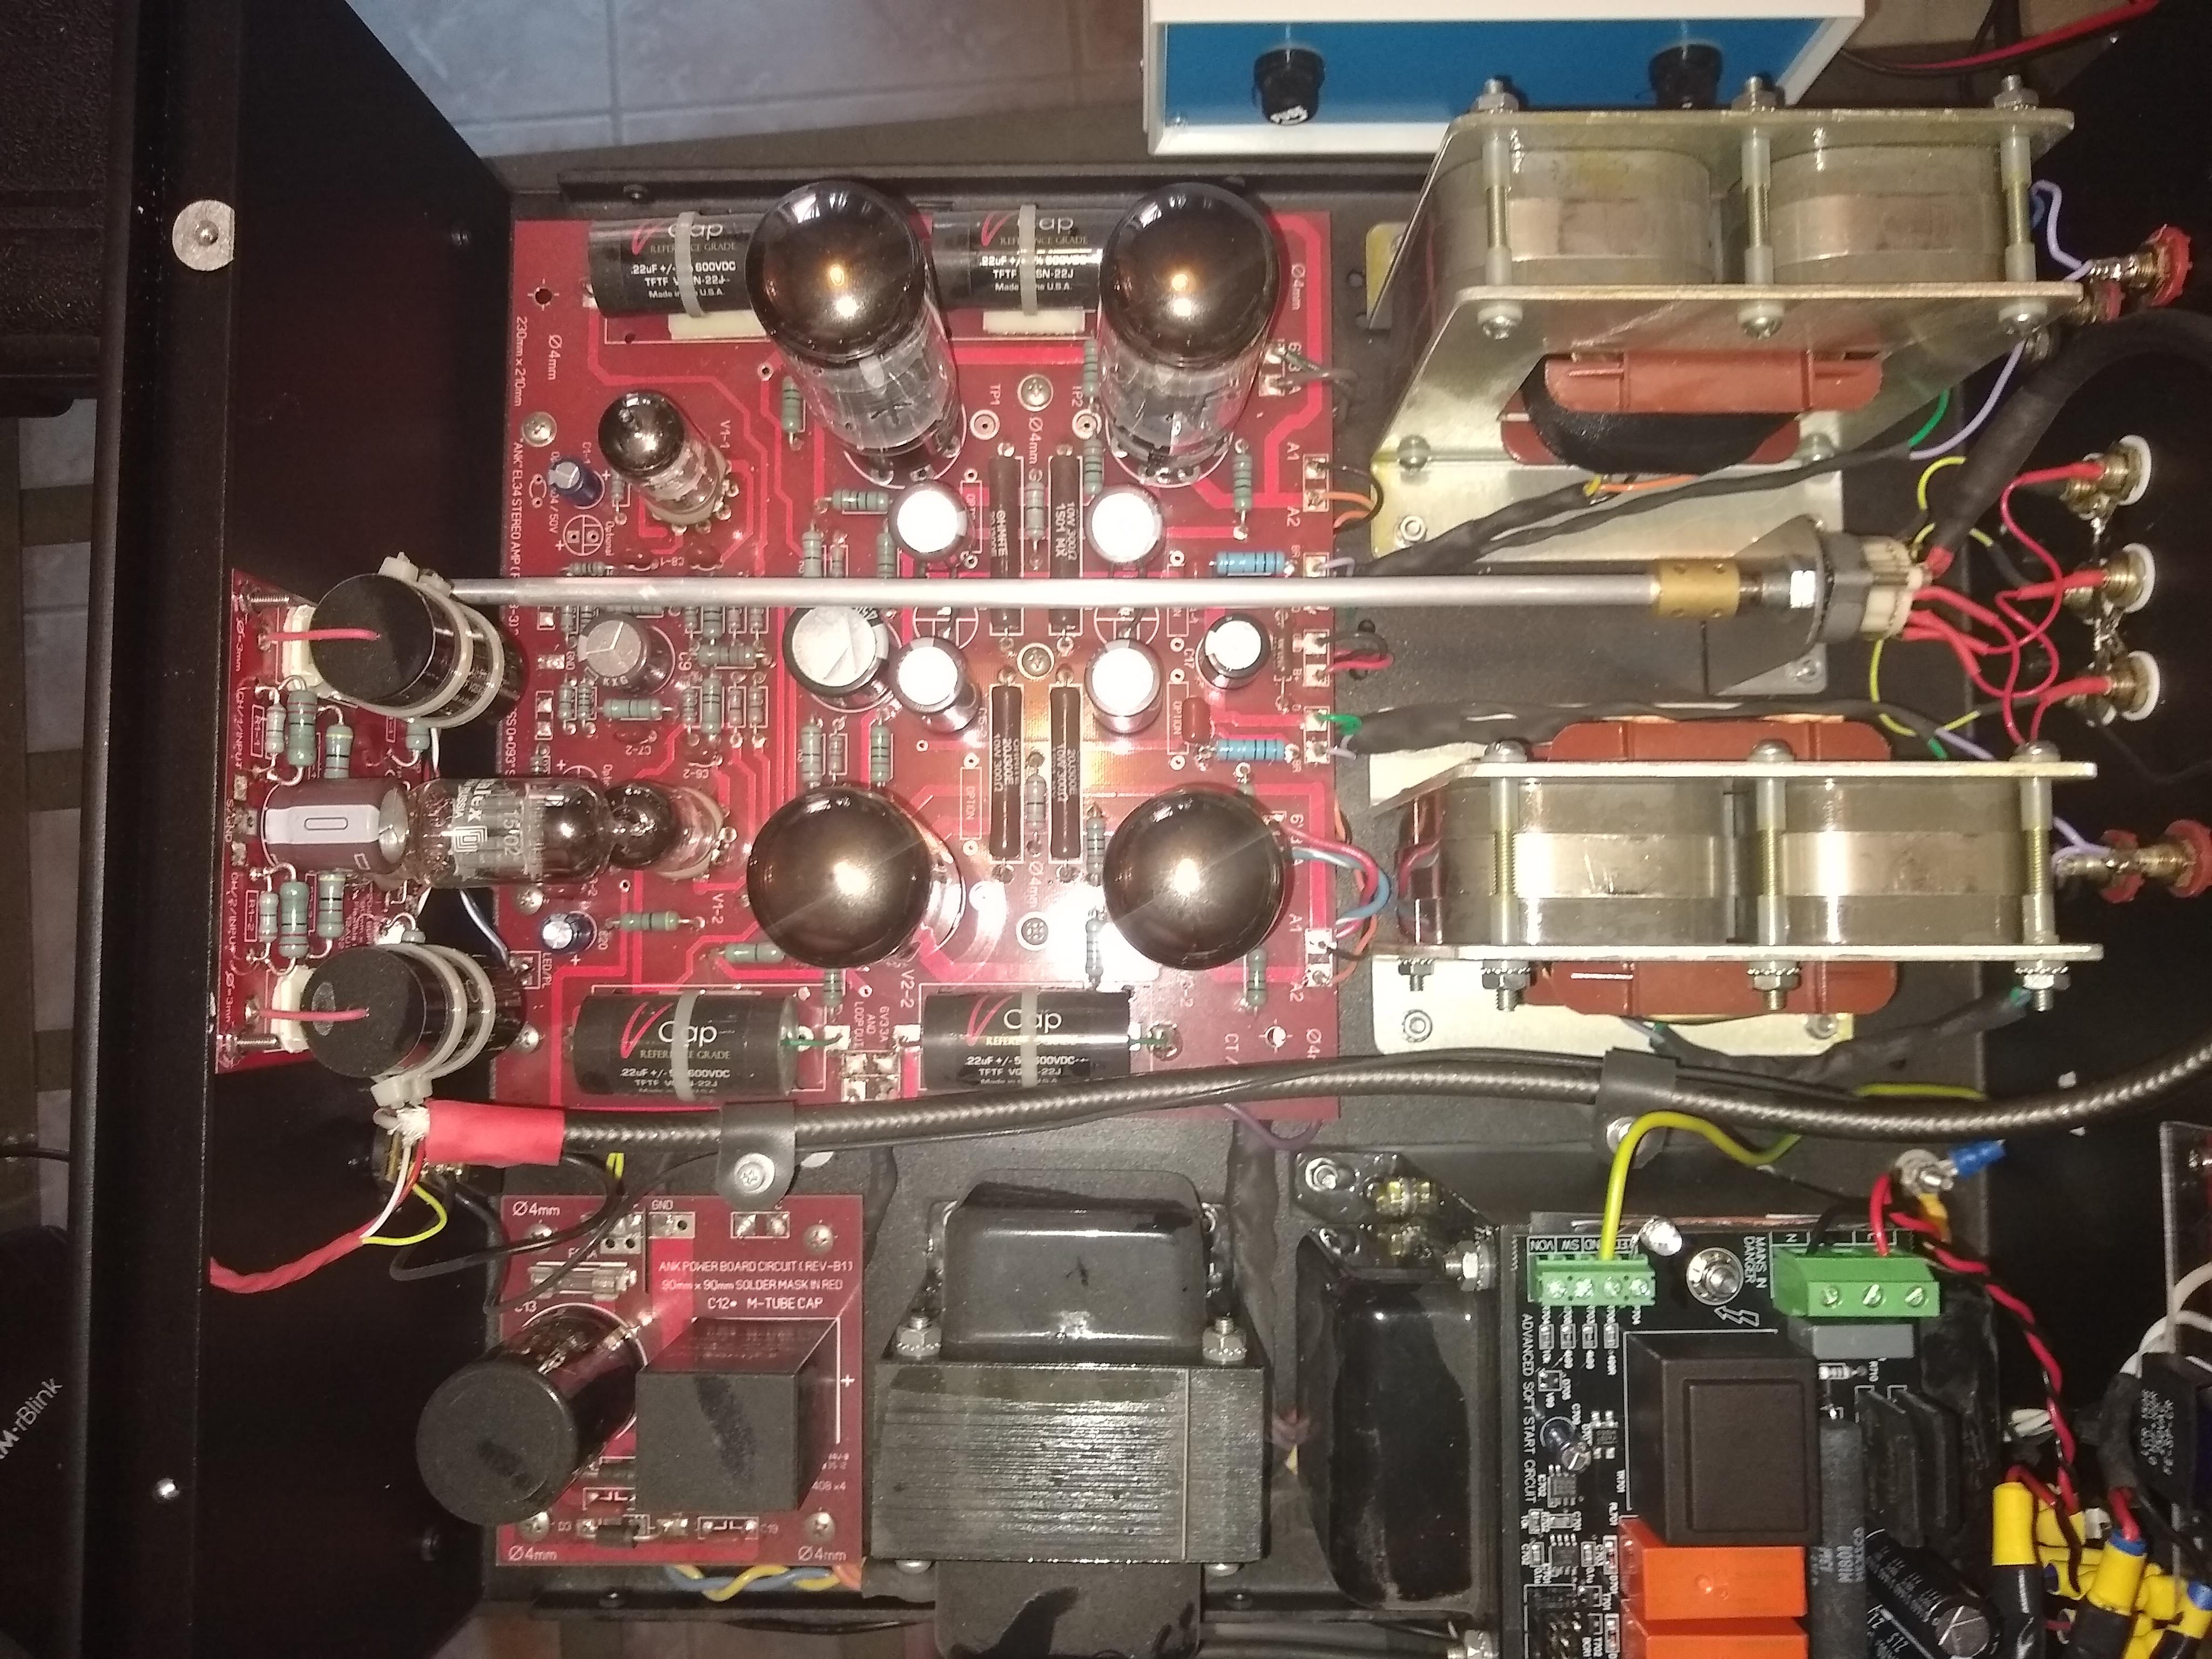
Once I’d studied the amplifiers circuit diagram for a while Id identified some likely suspects for replacement on the resistor front mostly along the signal path. The new replacement parts for this could only be AN Tantalum, accept nothing less. Seriously! These are excellent resistors and the difference they can make is literally the difference between night and day. I also opted to replace the resistors along the screen high voltage line with some TKD 2W as the supplied resistors were a lower watt than recommended in the schematic. Actually, another great resistor similar in character to the Takman Metals but with a higher watt rating.
Now for the major investment. Here I chose to replace the already excellent V-Cap CUTF used on the preamp with Duelund CAST DC Copper. I also purchased another two CUTF bringing the total CUTF count up to four. They were now going to replace the TFTF on the EL34 board. First though, the new capacitors need to be cooked in my new cap burner for at least 300 hours to bring them up to some ware near the total time the existing CUTF that were being recycled already had.
Included in this 3rd& final round:
- 2x Duelund CAST DC Copper.
- 4x V-Cap CUTF (2 reused from the pre).
- A selection of AN Tantalum on the signal path.
- A selection of TKD 2W on the high voltage to the screen grid (…I think)
NOTE: If anyone is interested, I can supply a list of the resistors replaced on request.

Conclusion
What can I say, well this turned out to be a long and ultimately expensive journey. Was it worth it? A resounding yes, absolutely. I personally think I may have created the best home modded ANK C-Core EL34 amplifier on the planet. Would I recommend doing these mods to someone else? Of course I would…If you want to make the same changes yourself to an already built amp, id say go for it. But be warned it’s not for the faint hearted. The amplifier doesn’t lend itself well to being modified, it’s a total PITA to take apart and put back together again. To de-solder/re-solder a PCB is really difficult to do without causing damage to the solder pads and circuit traces. Believe me, my amplifier has sustained some battle wounds along the way as well. Thankfully nothing that couldn’t be worked around with a bit of ingenuity. If you are building one from scratch, buy everything I’ve detailed above. Invest, build and enjoy probably the best EL34 you’ll ever have the honor of listening to.
Ok, so how does it sound? Hmmm…For starters the sounstage is immense. My speaker’s seem to have completely disappeared from the mix now. Listening to a digital source is a dream, everything is in the right place with the music seemingly effortlessly floating through the air. I’ve likened it in description before to being not unlike a flag fluttering in the wind. Listening to vinyl is equally impressive, sooo smooth, sooo detailed, sooo engaging and most importantly sooo real. I just love it! I think I understand now when I’ve heard the term Bloom used before in describing the effect that tantalum resistors can impart on the presentation. The use of the Duelund CAST caps which were a big leap of faith for me have taken this thing to the next level. I’m frankly astonished by there influence on the whole. As for the CUTF’s what can I say, this has from the start been a great cap, I’ve never doubted the validity of investing in these since experiencing the impact they had in the earlier upgrade.
My final setup (If your interested)
- Obviously… ANK EL34 Level 4 C-Core.
- Valves
- 4x PSVane Phillips Holland replica EL34.
- 2x Telefunken ECF80 NOS.
- 1x ECC82/CV4003 Mullard Cryo NOS.
- Project Essential III + Dynavector 10X5 cartridge.
- Cambridge Audio CP1 Phono preamp.
- Arcam Blink Bluetooth DAC.
- Lowther Fidelio Rear Horn Speakers + EX series drivers.
- The old faithful - REL Strata Subwoofer (Still bringing thunder and tight as ever after 20 years).
- Old school Ixos silver interconnects.
- New school Chord company interconnects.
- Old school Van Den Hul CS122 silver speaker cable."
Many thanks to R.T. for sending this in, we love to see how people approach modding and its great seeing the progression of a sound system, and we're even happier when we hear that its turned out great! (plus its lovely to see previous posts we've made to this blog coming in handy for our customers!!)
If you've got a project you'd like to share, or if you're working on a project you think we here at hifi collective and our customers will enjoy reading about and following please dont hesitate to get in touch with Nick at info@hificollective.co.uk.
Thanks again to R.T. for this insightful write up and photos!