Glasshouse XLR Balanced Interconnect Cable Kit No.14
With the recent introduction of the new Amtrans OFC gold plated TRIPLE 0.4mm dia, with sleeving, we thought what better way to illustrate the neutrality of said wire than in a balanced interconnect kit.
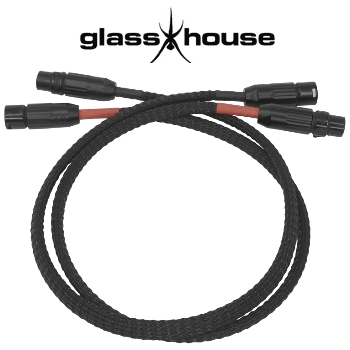
The Amtrans triple wire consists of 3 lengths of PFA insulated, 0.4mm diameter gold plated solid core OFC copper, each differently coloured PFA so easily identifiable. The wires are twisted together and hold their form well as they are solid cores. The connectors are Swithcraft`s black-bodied gold-plated XLR plugs, not too expensive but great performers. Before proceeding, you have to decide if you want your balanced cable to be screened - Advisable for cables over 1 metre in length to reduce RF pickup and make your cable low noise. For screening, we use the Screening Braid: BTUBE 3mm. This is further covered by ABS12: ABS Expandable Sleeving 12mm. This further reduces the noise level.
A relatively easy build. Follow these steps.
- The XLR connections are denoted pin 1, ground (gold/transparent coloured wire), pin 2, positive or HOT (red coloured wire) and pin 3, negative or COLD (blue coloured wire). Take the female XLR and unscrew the shell. Remove the rubber grommets and discard them. Using the soldering iron tip remove 6mm of the PFA sleeving by tracing a ring 6mm in, melting the PFA and pulling off the sleeving to expose the bare wire.
- Tin the exposed wire with solder, then, in turn, solder the correct coloured wire to the XLR plug pins.
- Measure out the length of the BTUBE braid.
- Using a bare wire of around 0.5mm diameter, make a loop around one end of the BTUBE braid and solder it to the braid, leaving a loose end of around 30mm long to be attached to the plug. Cut off any loose braid that is exposed beyond the loop.
- Feed the Amtrans wire into the BTUBE starting at the soldered loop end.
- Cover the exposed wire of the loop with sleeving (0.5mm PTFE provided) and solder to the 4th flat solder tag of the XLR plug. This is not part of the signal portion but connects to the actual body of the connector.
- At the free end of the wire and sleeving, cover with the ABS sleeving and use 6cm of 12.7mm diameter heat shrink to cover the wire between the sleeving and the plug. Shrink on with a heat gun.
- Feed the strain relief, plug shells onto the cable, screwing the female end shut.
- Now for the male plug end. Feed on the cable the male shell, the male strain relief and 6cm of heat-shrink in that sequence.
- Repeat step 4.
- Repeat steps 1,2 & 6.
- Heat the heat-shrink to cover the wires, then screw on the male shell.
- Test continuity with a multimeter set to the DC resistance setting.
Parts list for a 0.5m pair of the unscreened version.
- 1m x Amtrans OFC gold plated TRIPLE 0.4mm dia, with sleeving
- 0.5m x Mundorf 3.8% silver/gold solder
- 20cm x 3.2mm heatshrink (red)
- 20cm x 3.2mm heatshrink (black)
- 2 x Switchcraft XLR male plug, gold-plated, black-bodied
- 2 x Switchcraft XLR female plug, black-bodied, gold-plated
Parts list for a 0.5m pair of the screened version.
- 1m x Amtrans OFC gold plated TRIPLE 0.4mm dia, with sleeving
- 1m x ABS12: ABS Expandable Sleeving 12mm
- 1m x Screening Braid: BTUBE 3mm
- 0.5m x Mundorf 3.8% silver/gold solder
- 20cm x 12.7mm heat shrink (black)
- 20cm x 12.7mm heat shrink (red)
- 2 x Switchcraft XLR male plug, gold-plated, black-bodied
- 2 x Switchcraft XLR female plug, black-bodied, gold-plated
- 10cm x PTFE sleeving (for 0.5mm dia wire)
Use these instructions for those who do not wish their cable to be screened.
- The XLR connections are denoted pin 1, ground (gold/transparent coloured wire), pin 2, positive or HOT (red coloured wire) and pin 3, negative or COLD (blue coloured wire). Take the female XLR and unscrew the shell. Using the soldering iron tip remove 6mm of the PFA sleeving by tracing a ring 6mm in, melting the PFA and pulling off the sleeving to expose the bare wire.
- Tin the exposed wire with solder, then, in turn, solder the correct coloured wire to the XLR plug pins.
- Feed on 6mm of 3.2mm diameter heat-shrink and run to the end shrink on with a heat gun.
- Feed the strain relief and plug shells onto the cable keeping the rubber grommet in place, screwing the female end shut.
- Now for the male plug end. Feed on the cable the male shell, the male strain relief and 6cm of heat-shrink in that sequence.
- Repeat steps 1,2 & 3.
- Test continuity with a multimeter set to the DC resistance setting.
PRICE for a stereo pair (start from)
£58.12 +vat +p&p (unscreened)
£64.54 +vat +p&p (screened)
The video below details the construction of a screened XLR cable using Mundorf SGW305 and Neotech XLR NC-06615 plugs - please note these are the parts not used in the no 14 kit. However, the construction follows the same method.